From Code to Reality: Building a Production-Grade IoT Device
A complete, end-to-end guide on building a secure, scalable IoT device using ESP32, MQTT, and AWS IoT Core. We bridge the gap between software logic and hardware reality.
Read More →
* SYSTEM.NOTICE: Affiliate links support continued laboratory research.
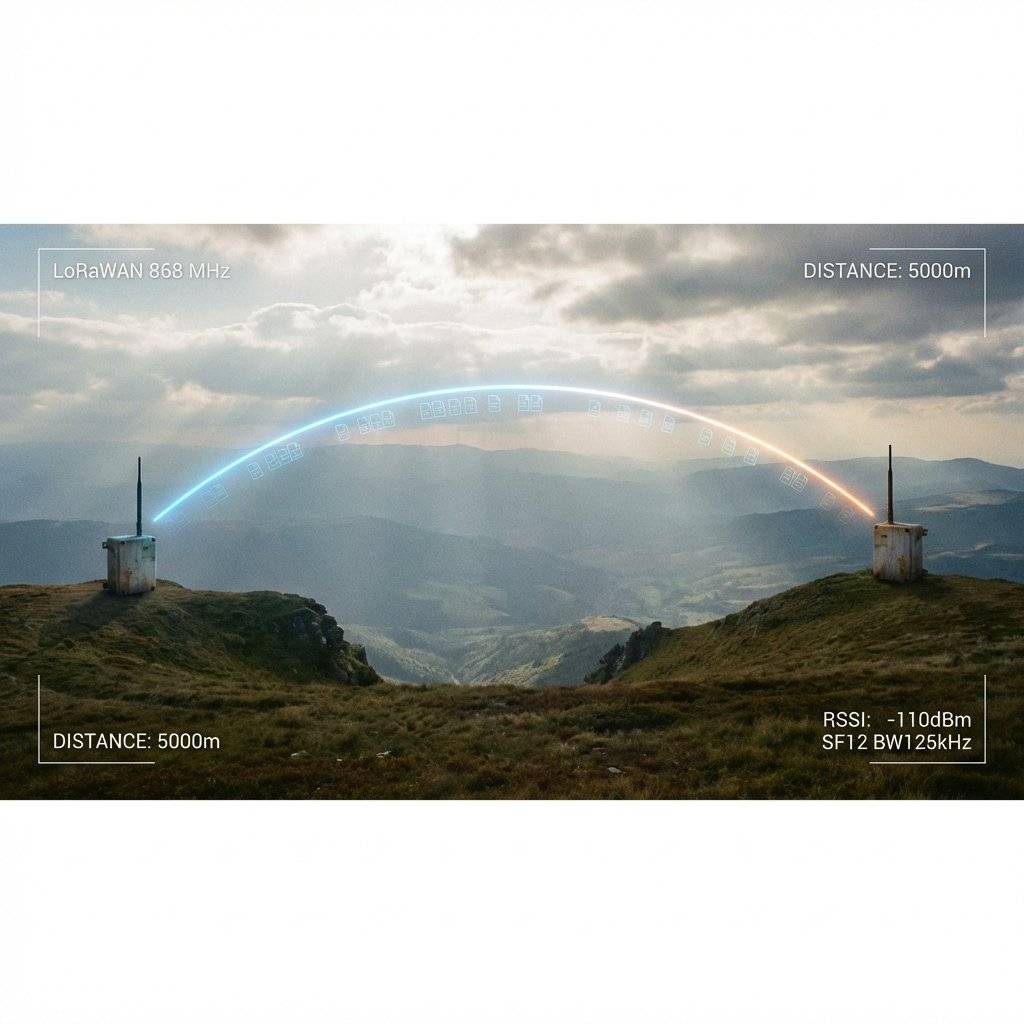
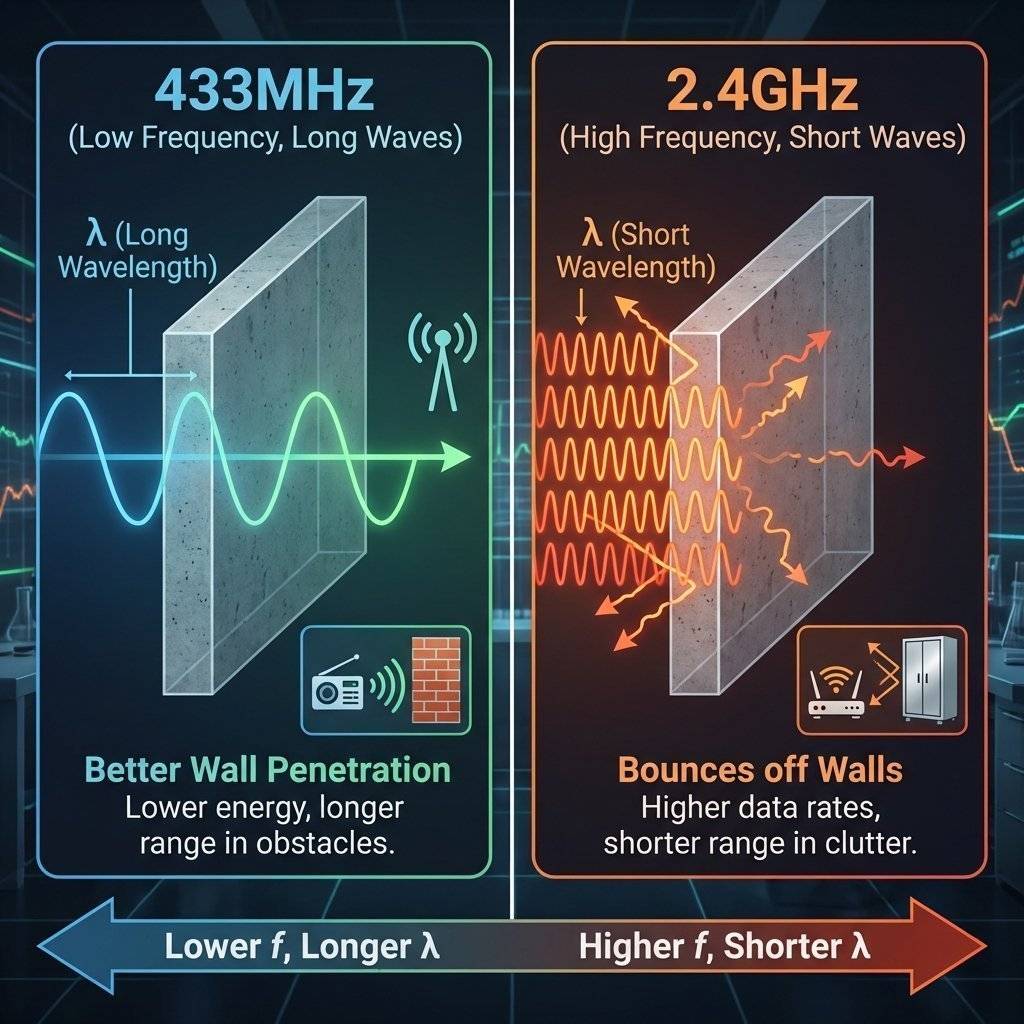
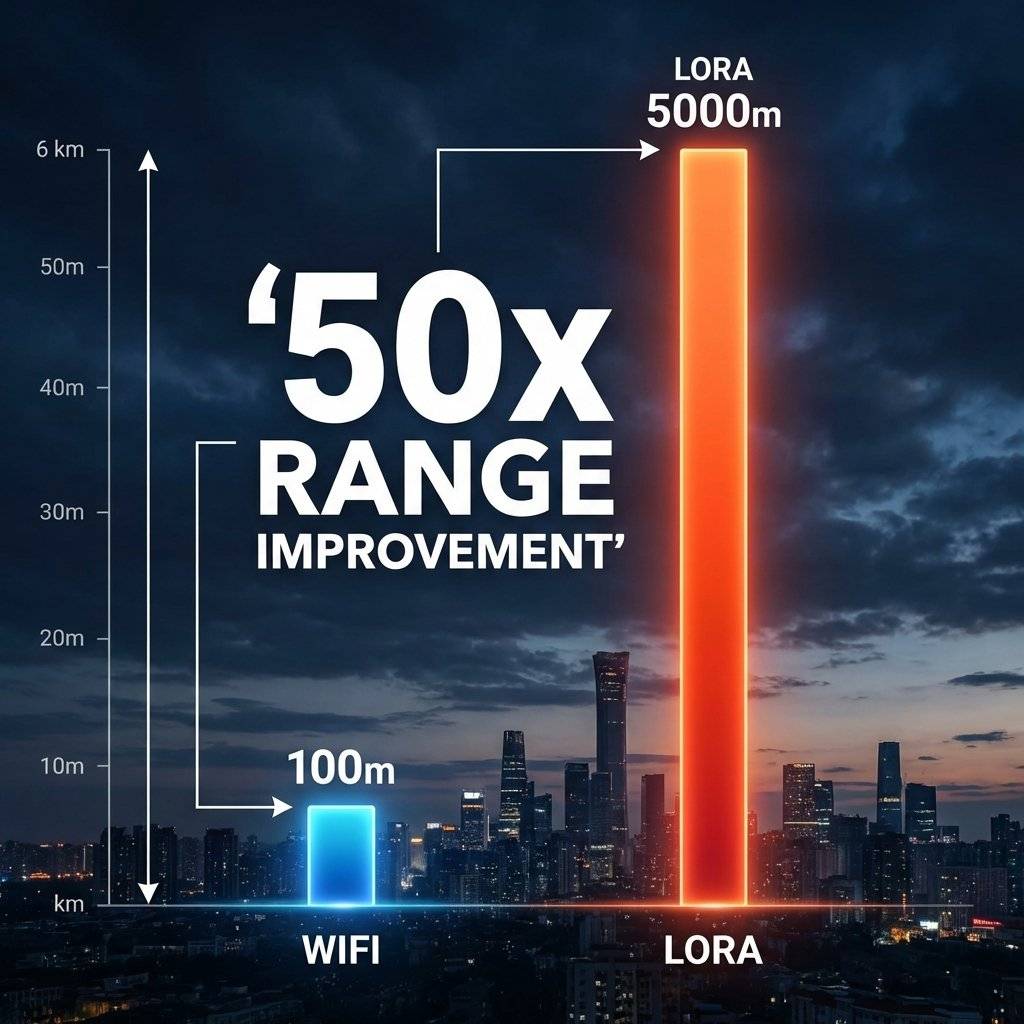
We are spoiled by WiFi. High speed, video streaming, instant connection. But WiFi has a fatal flaw: Range. Walk 50 meters away from your router, and the signal dies. What if you want to monitor a water tank on a farm? A mailbox at the end of a long driveway? A weather station on a hill?
You don’t need speed (Video). You need Distance. Enter LoRa (Long Range). It can send small packets of data over 5 Kilometers (3 Miles) using a fraction of the power of WiFi. Today, we leave the house and conquer the outdoors.
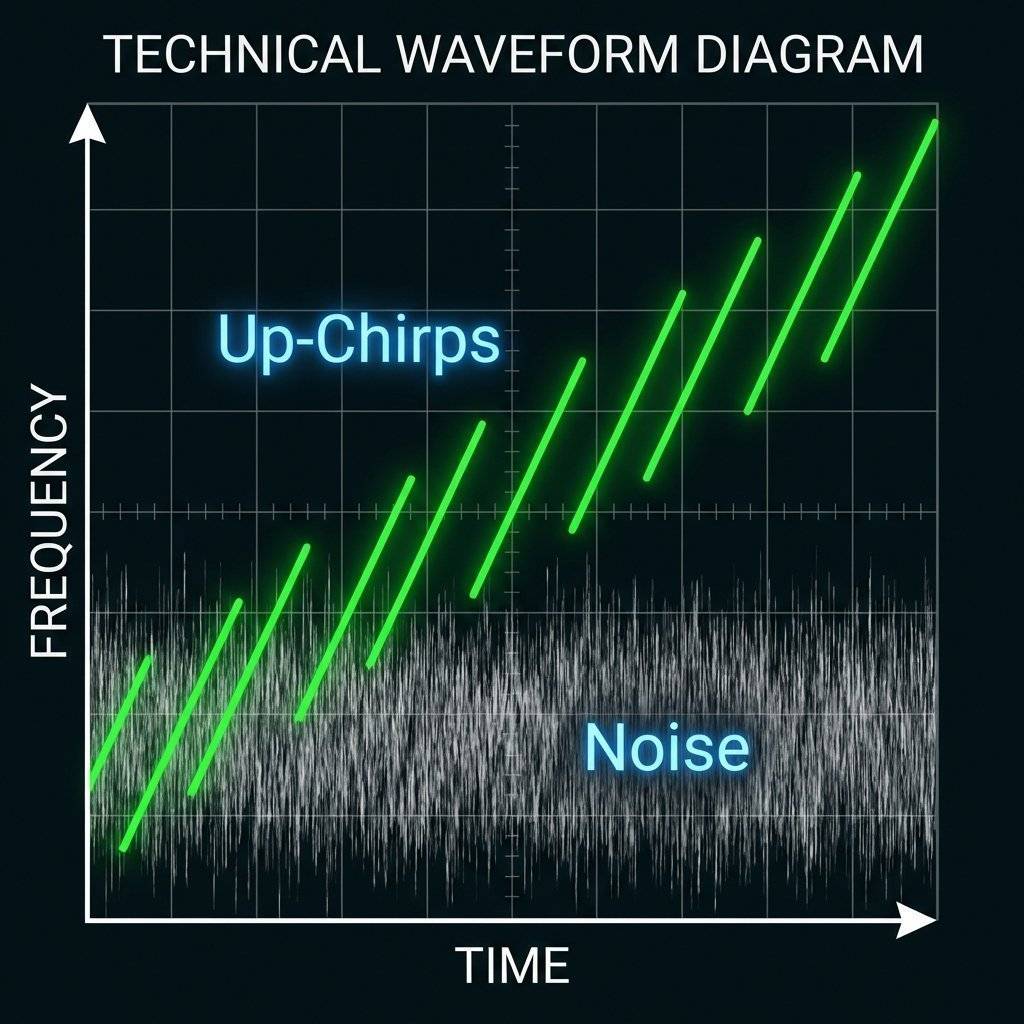
How can a tiny chips transmit 5km on a coin cell? The secret is Chirp Spread Spectrum (CSS).
Imagine you are at a loud party (Noise).
Even if the whistle is quieter than the noise partition, the human ear (and the LoRa chip) can pick out the “Slope” of the rising tone.
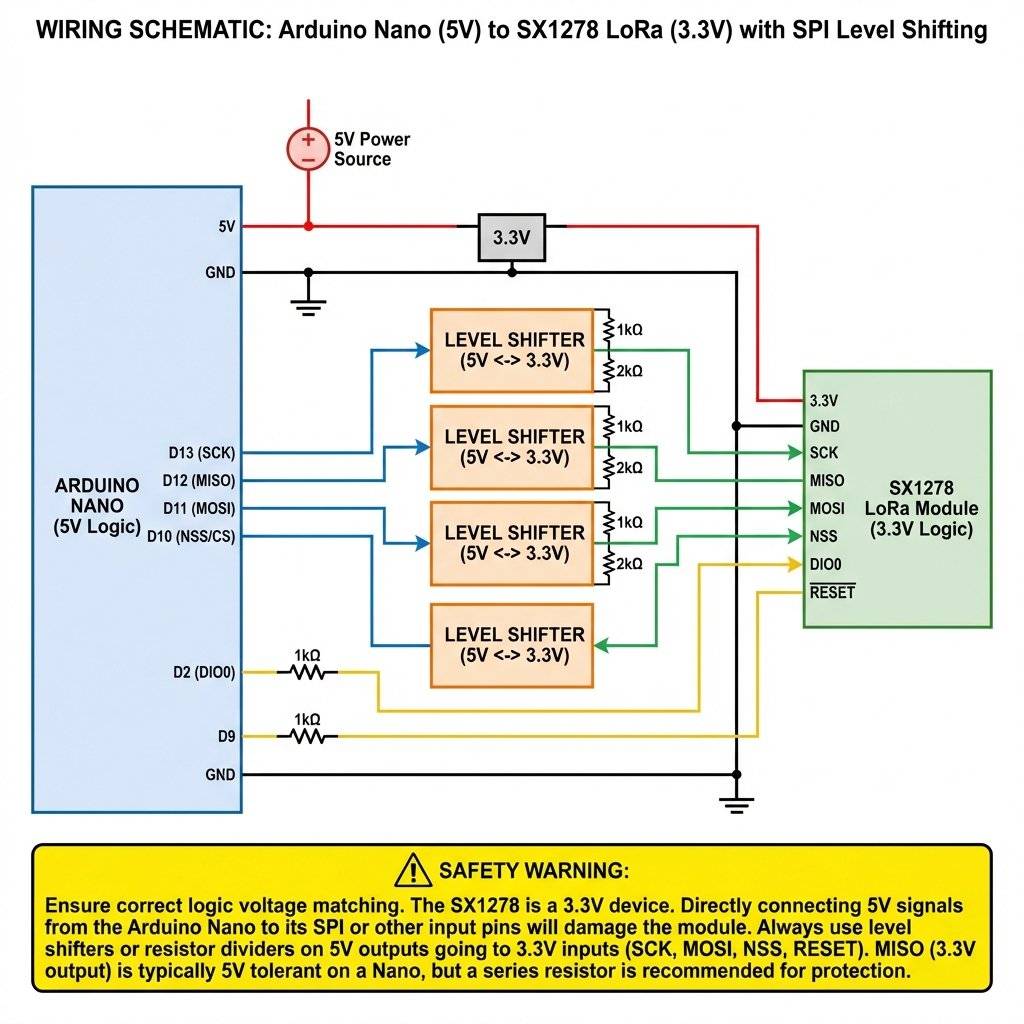
We use the Semtech SX127x series chips.
CRITICAL WARNING: 3.3V Logic! Most LoRa modules are 3.3V Only. Connecting them directly to a 5V Arduino Uno will fry the SPI pins.
Standard Pinout (SPI):
| SX1278 Pin | Arduino Uno | ESP8266 |
|---|---|---|
| VCC | 3.3V | 3.3V |
| GND | GND | GND |
| MISO | D12 | D6 |
| MOSI | D11 (Shift) | D7 |
| SCK | D13 (Shift) | D5 |
| NSS (CS) | D10 (Shift) | D8 |
| DIO0 | D2 | D1 |
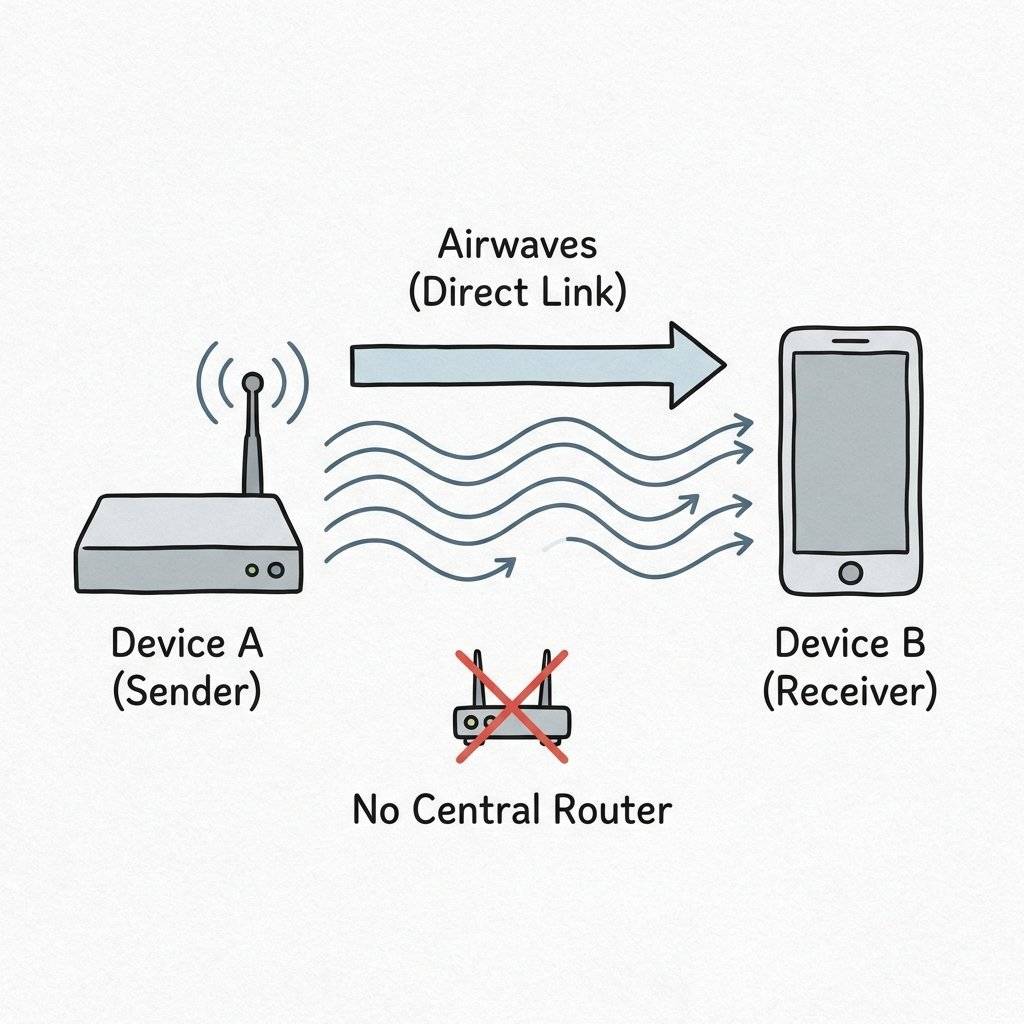
We will not use LoRaWAN (The Cloud Gateways) today. We will do raw Point-to-Point. Think of it like Walkie-Talkies.
Library: sandeepmistry/arduino-LoRa (Install via Library Manager).
#include <SPI.h>
#include <LoRa.h>

// Define pins for ESP8266 (Change for Arduino)
#define ss 15  // D8
#define rst 16 // D0
#define dio0 5 // D1

int counter = 0;

void setup() {
  Serial.begin(115200);
  LoRa.setPins(ss, rst, dio0);
// 433E6 for Asia, 866E6 for Europe, 915E6 for USA
  if (!LoRa.begin(433E6)) {
    Serial.println("Starting LoRa failed!");
    while (1);
  }
  Serial.println("LoRa Sender Ready");
}

void loop() {
  Serial.print("Sending packet: ");
  Serial.println(counter);

  // Send Logic
  LoRa.beginPacket();
  LoRa.print("Hello LoRa ");
  LoRa.print(counter);
  LoRa.endPacket();

  counter++;
  delay(5000);
}#include <SPI.h>
#include <LoRa.h>
#define ss 15
#define rst 16
#define dio0 5
void setup() {
Serial.begin(115200);
LoRa.setPins(ss, rst, dio0);
if (!LoRa.begin(433E6)) {
Serial.println("Starting LoRa failed!");
while (1);
}
}
void loop() {
// try to parse packet
int packetSize = LoRa.parsePacket();
if (packetSize) {
// received a packet
Serial.print("Received packet '");
// read packet
while (LoRa.available()) {
Serial.print((char)LoRa.read());
}
// print RSSI of packet
Serial.print("' with RSSI ");
Serial.println(LoRa.packetRssi());
}
}
(Troubleshooting Range)
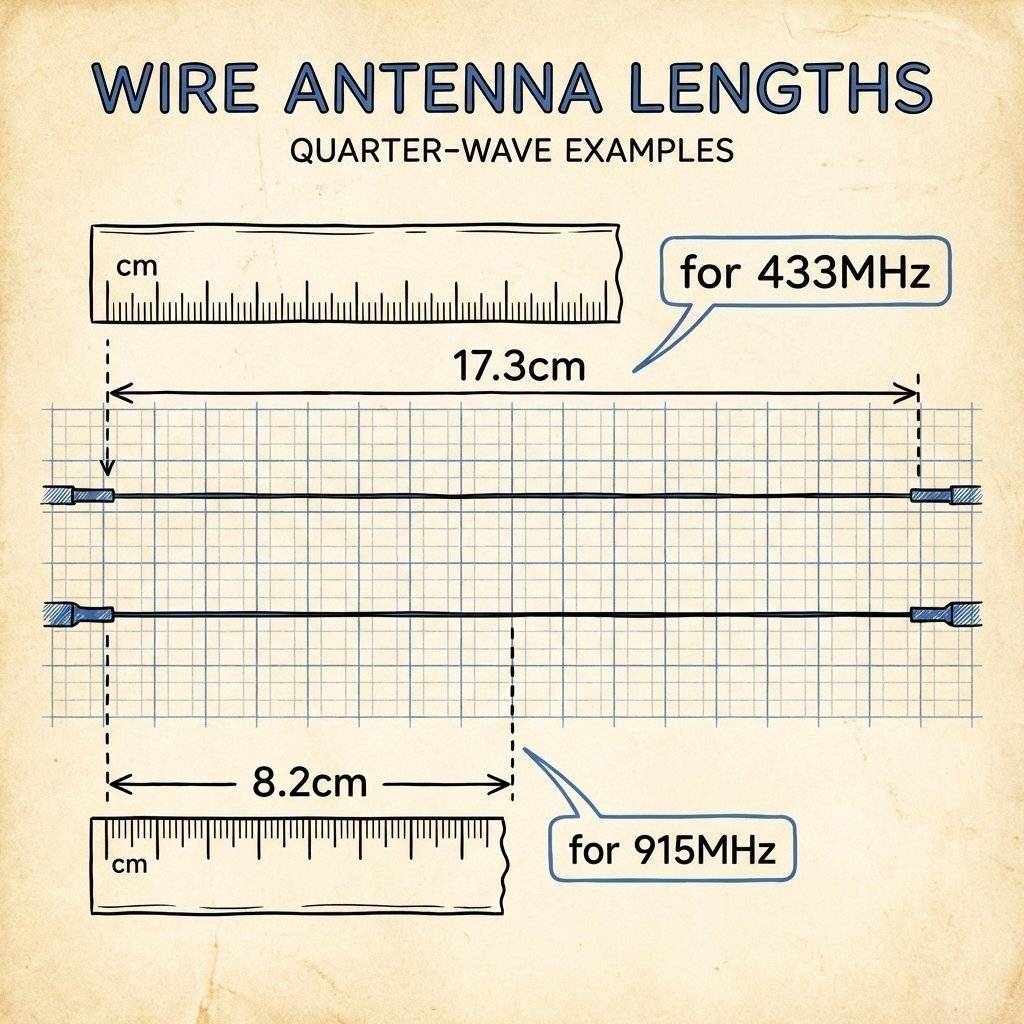
Your module likely came with a small coil spring antenna. It is… garbage. For 5km range, you need a proper Quarter Wave Monopole.
The Math:
Pro Tip: Take a solid core wire, cut it to exactly 17.3cm (for 433MHz), and solder it to the ANT pin. This single change can double your range.
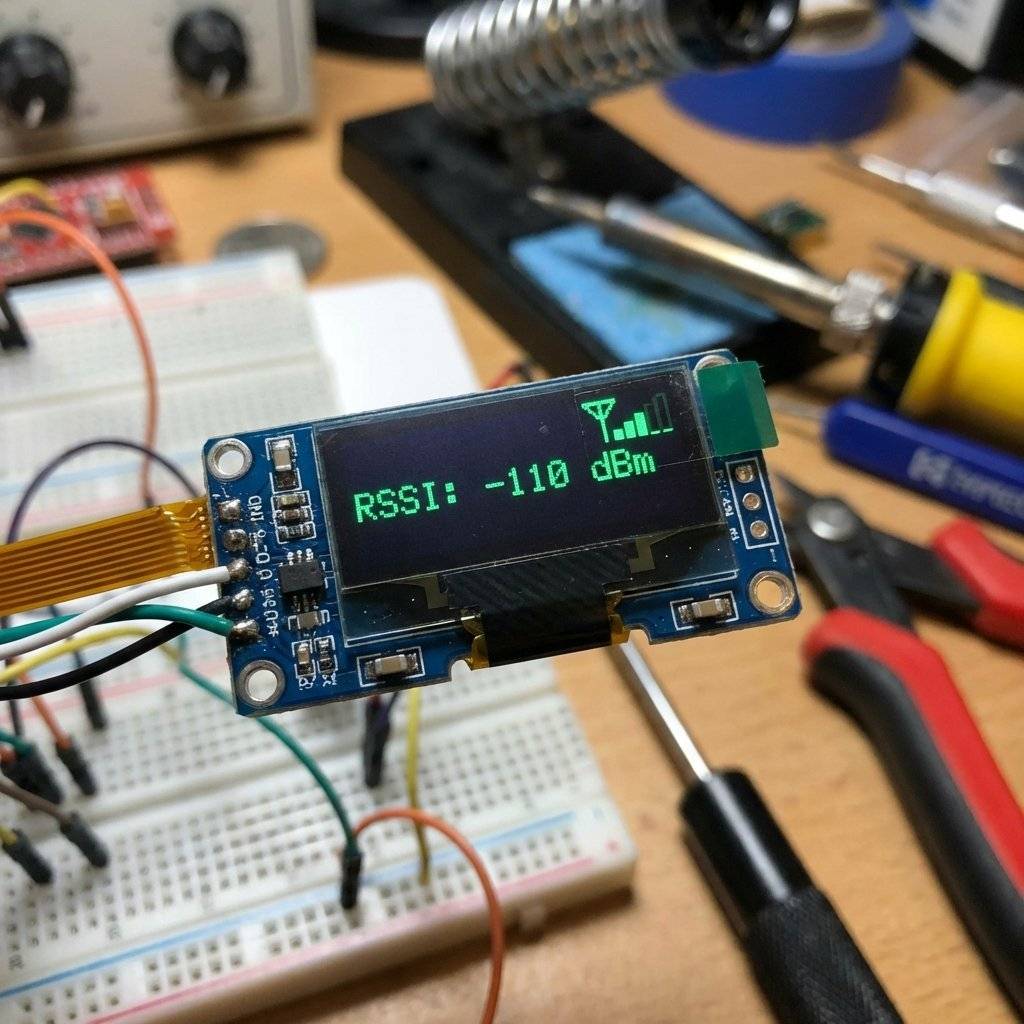
When you receive a packet, you get two numbers:
RSSI (Received Signal Strength Indicator):
-30 dBm: Perfect (nearby).
-120 dBm: Warning zone (failing).
-148 dBm: Technical limit.
SNR (Signal-to-Noise Ratio):
Positive (+10dB): Signal > Noise.
Negative (-20dB): Signal < Noise (LoRa works here!).
Why not just use WiFi Extenders? Physics.
| Protocol | Range | Speed | Power |
|---|---|---|---|
| WiFi | 100m | 100 Mbps | High (80mA) |
| Bluetooth | 10m | 2 Mbps | Low (10mA) |
| LoRa | 5km+ | 0.3 Kbps | Very Low (10mA trans) |
Note the speed: 0.3 Kbps. You cannot send pictures. Only text/numbers.
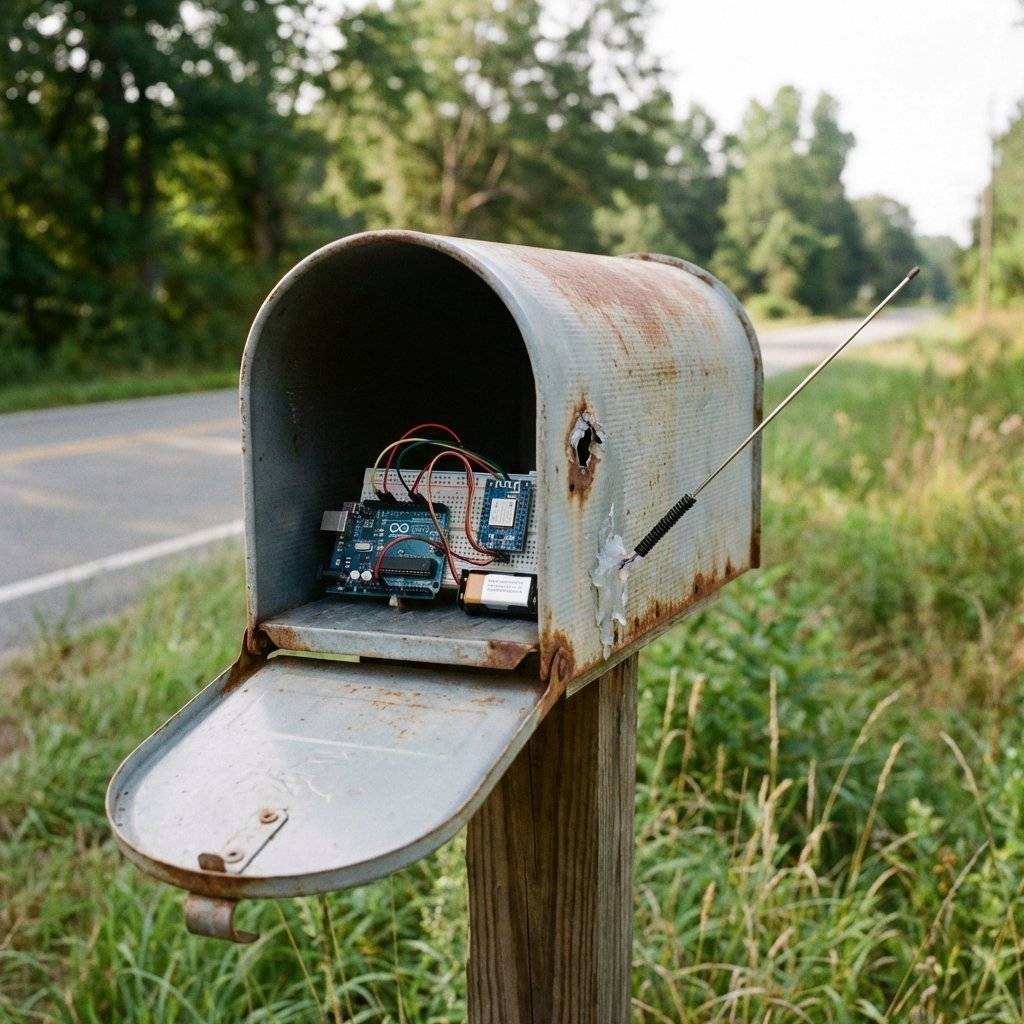
I built a sensor to tell me when the postman arrives. My mailbox is 300m away, at the bottom of a hill, made of Steel.
The Challenge: Steel blocks radio waves (Faraday Cage). The solution:
Result: It works reliably at -115dBm. WiFi wouldn’t even detect the network name.
The LoRa.begin() function uses default settings. But you can tune the “Spreading Factor” (SF) to trade speed for range.
Spreading Factor controls how “stretched” out the chirps are in time.
The Trade-off: Increasing SF by 1 step roughly doubles the airtime (battery usage) and gives you ~2.5dB extra sensitivity.
// Tuning for Max Range (but very slow)
LoRa.setSpreadingFactor(12);
LoRa.setSignalBandwidth(125E3);
LoRa.setCodingRate4(5);
warning: If you set SF12, sending “Hello” might take 2 seconds!
We used P2P (Point-to-Point) today.
LoRaWAN (The Network Protocol)
Guideline:
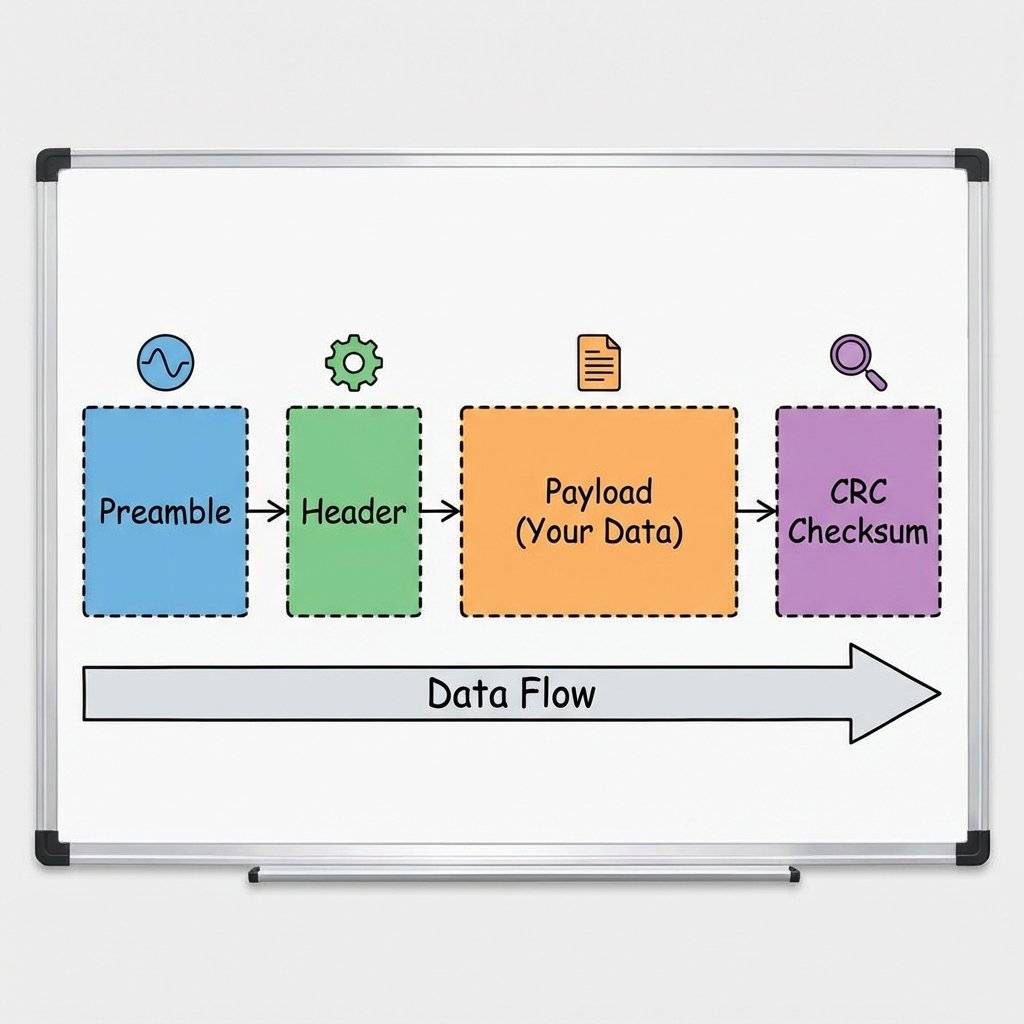
LoRa isn’t just streaming raw bytes. The Semtech chip wraps your data.
Code Optimization: Minimize your payload! Sending “Temperature: 24.5C” takes longer than just “24.5”. Longer airtime = More battery usage.
LoRa changes how you think about connectivity. You stop worrying about “Do I have WiFi bars here?” and start thinking in Kilometers. It is the backbone of Smart Agriculture and Smart Cities.
Now, go build something that talks to the horizon.Copyright © 2026 TechnoChips. Open Source Hardware (OSHW).

A complete, end-to-end guide on building a secure, scalable IoT device using ESP32, MQTT, and AWS IoT Core. We bridge the gap between software logic and hardware reality.
Read More →
Stop polling your server every 5 seconds. Learn why Professional IoT uses MQTT. Master Pub/Sub architecture, QoS levels, Retained Messages, and Last Will & Testament.
Read More →
Run your IoT sensors for a year on a single coin cell. Mastering ESP8266 Deep Sleep, RTC Memory persistence, and the hardware hacks needed to achieve 20uA power consumption.
Read More →