From Code to Reality: Building a Production-Grade IoT Device
A complete, end-to-end guide on building a secure, scalable IoT device using ESP32, MQTT, and AWS IoT Core. We bridge the gap between software logic and hardware reality.
Read More →
* SYSTEM.NOTICE: Affiliate links support continued laboratory research.
Today, we build a bridge.
We are going to master Serial Communication (UART).
We will not just use Serial.println("Hello World").
We are going to send complex data packets.
We are going to write a Python Script on your PC to talk back.
We are going to create a Connected System.

When you plug in the USB cable, you aren’t just powering the board.
You are creating a data pipeline.
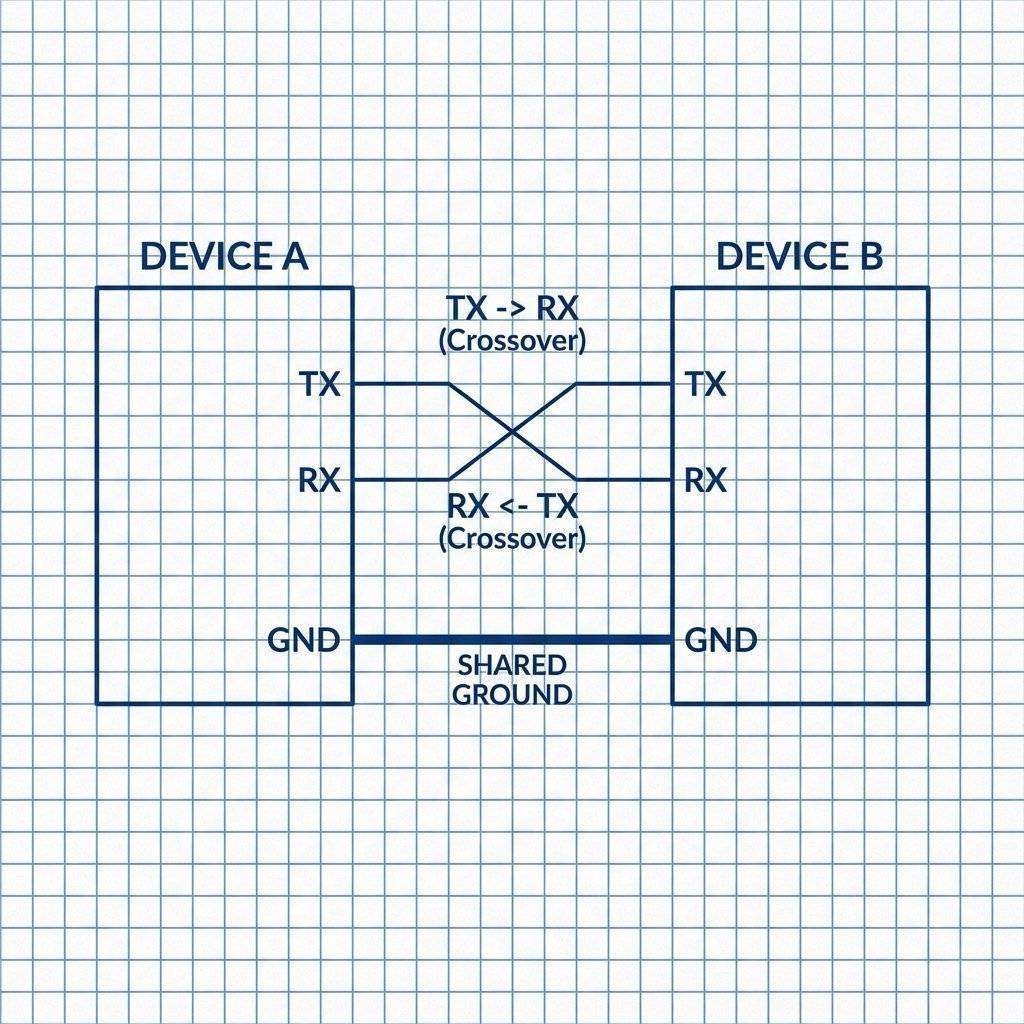
Inside the USB cable, there are two data wires: D+ and D-.
The chip on the Arduino converts this USB signal into UART.
UART uses two dedicated lines:
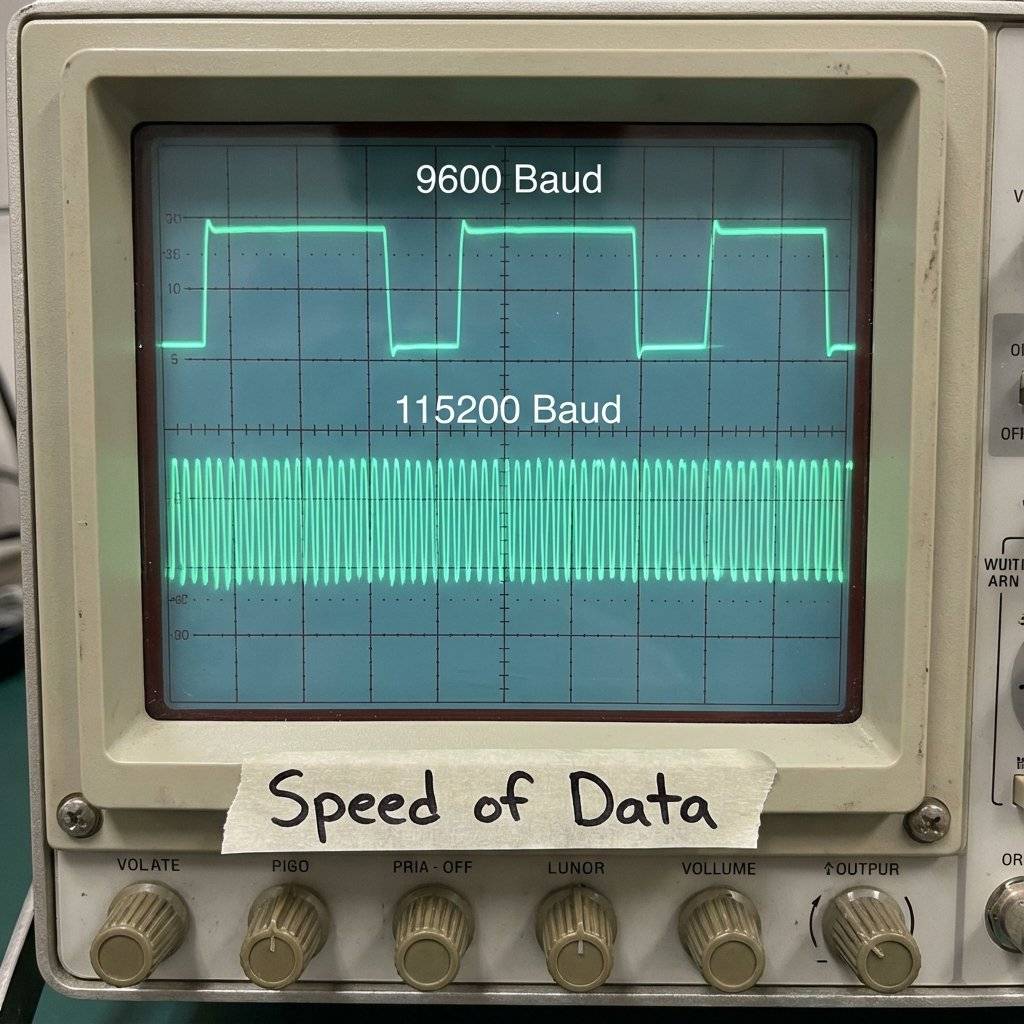
You have seen Serial.begin(9600). What is 9600?
It is the Baud Rate (Bits Per Second).
There is no “Clock” wire in UART (unlike I2C).
So both sides must agree on the speed before the conversation starts.
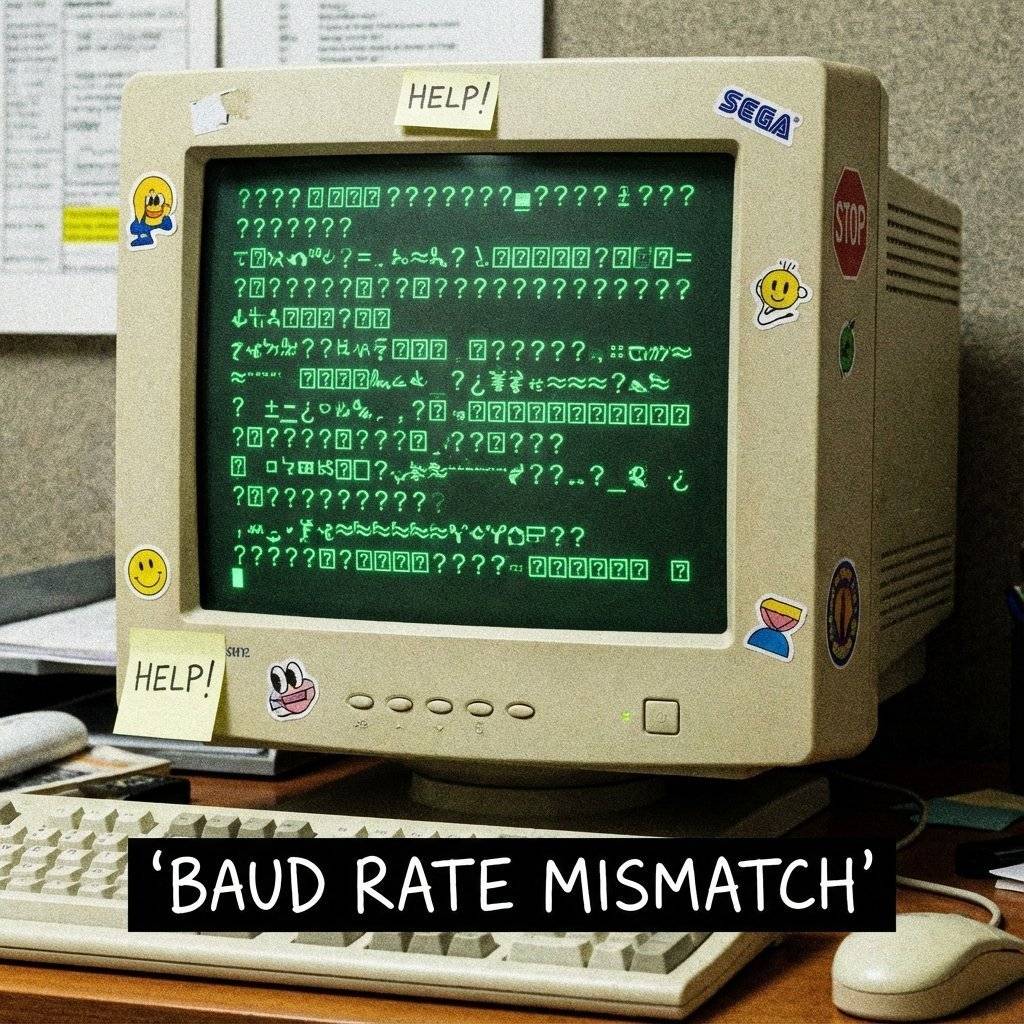
If you speak at 115200 but I listen at 9600, I will hear garbage.
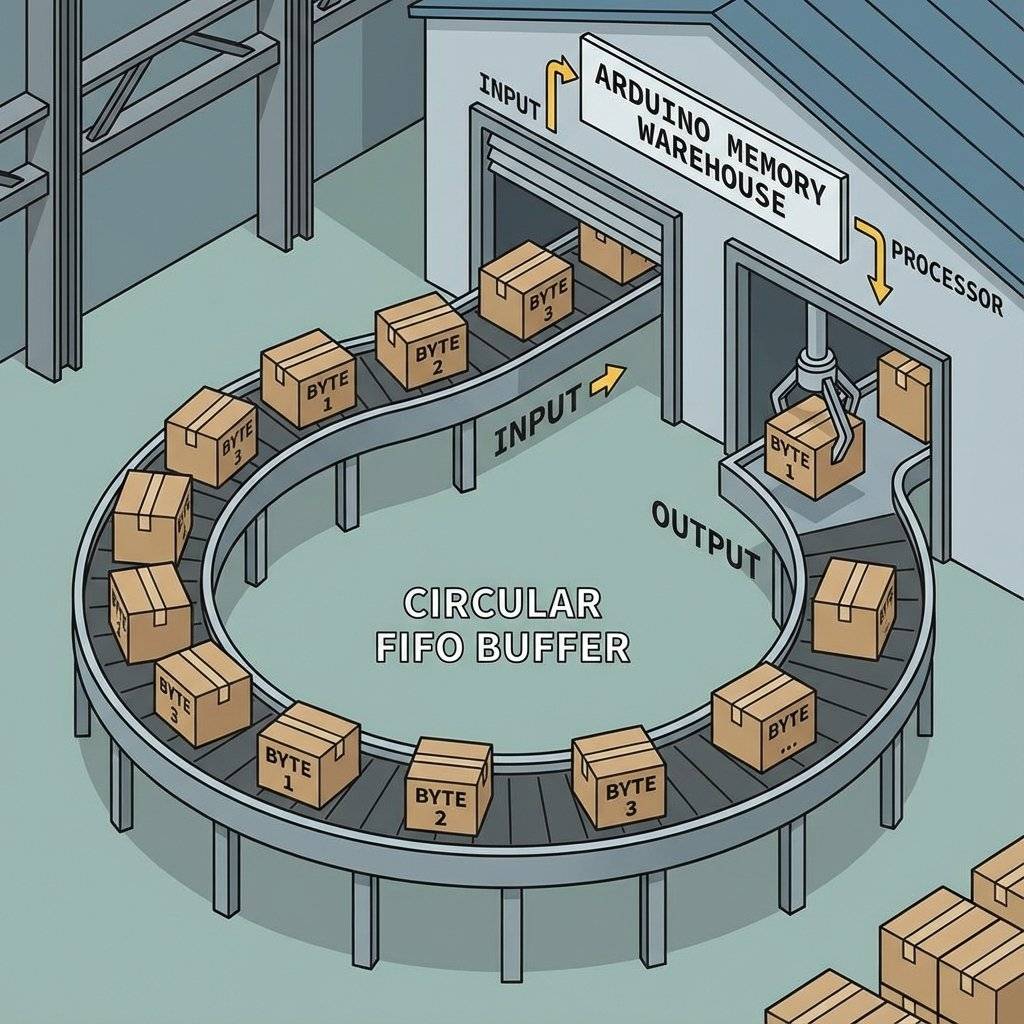
Imagine a conveyor belt (FIFO - First In, First Out). When data arrives at the Arduino, it doesn’t go straight to the processor.
Let’s build a weather station that sends Temperature, Humidity, and Light Level.
We shouldn’t just send text. We should send CSV (Comma Separated Values).
24.5,60,850
// Arduino Sender Code
int temp = 24;
int humidity = 60;
int light = 850;

void setup() {
  Serial.begin(115200); // Go fast!
}

void loop() {
  // Simulate sensor noise
  temp = 24 + random(-2, 2);
  humidity = 60 + random(-5, 5);
  light = 850 + random(-10, 10);

  // Send CSV Packet
  Serial.print(temp);
  Serial.print(",");
  Serial.print(humidity);
  Serial.print(",");
  Serial.println(light); // ln adds the 'End of Line' character

  delay(100); // Don't spam the buffer
}Now let’s flip it. The PC will send 100,255,50 to set an RGB LED.
Parsing this on Arduino is historically annoying.
void setup() { Serial.begin(115200); pinMode(9, OUTPUT); pinMode(10, OUTPUT); pinMode(11, OUTPUT); Serial.println(“Ready for Color Data (R,G,B)”); }
void loop() { if (Serial.available() > 0) { // Look for the next valid integer in the stream r = Serial.parseInt(); g = Serial.parseInt(); b = Serial.parseInt(); // Consume the newline character at the end if (Serial.read() == ‘\n’) { analogWrite(9, r); analogWrite(10, g); analogWrite(11, b); // Confirm receipt Serial.print(“Color Set: ”); Serial.print(r); Serial.print(”,”); Serial.print(g); Serial.print(”,”); Serial.println(b); } } }

## The Python Code
Now, the superpowers.
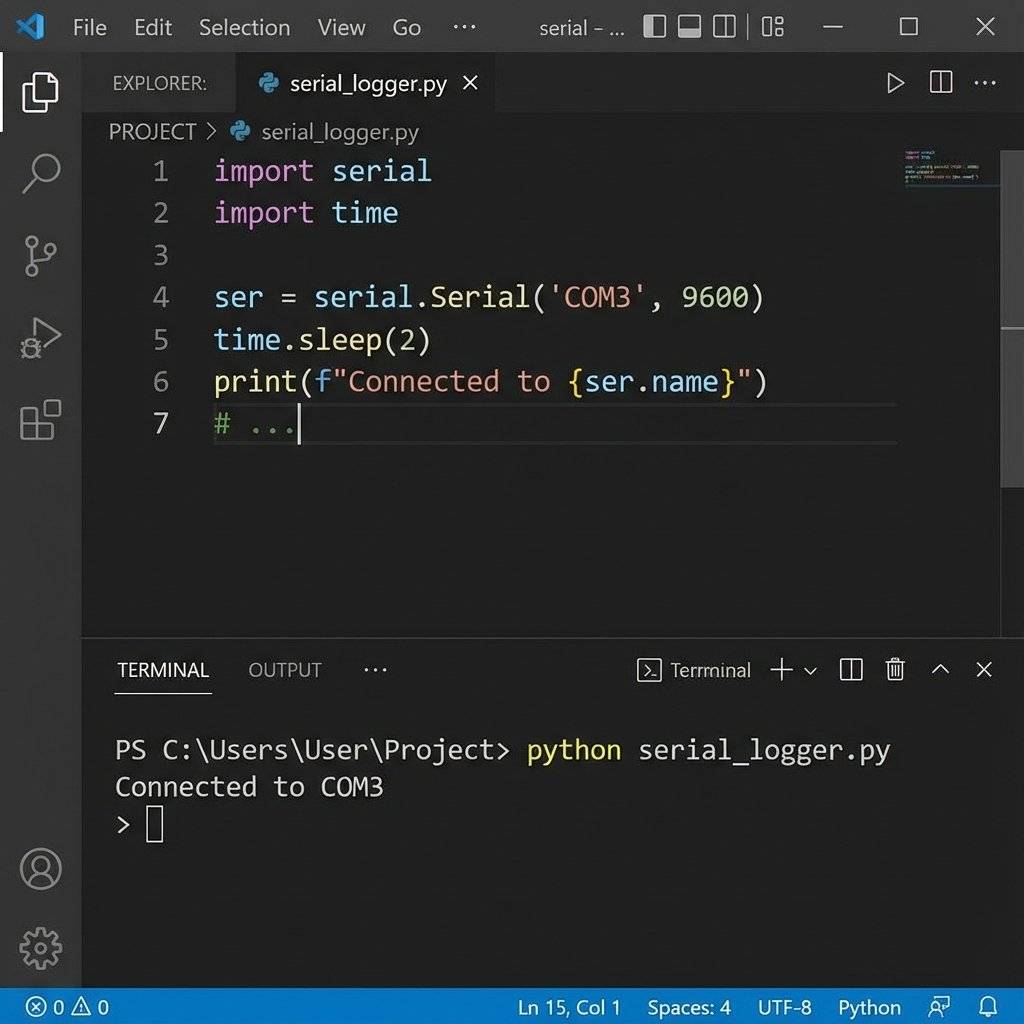
We will use Python to read the Arduino’s data and print it.
You need the `pyserial` library.
`pip install pyserial`
```python
import serial
import time
# Configure the connection
# CHANGE 'COM3' to your port (Windows) or '/dev/ttyUSB0' (Linux/Mac)
arduino = serial.Serial(port='COM3', baudrate=115200, timeout=.1)
def write_read(x):
arduino.write(bytes(x, 'utf-8'))
time.sleep(0.05)
data = arduino.readline()
return data
while True:
num = input("Enter a number: ") # Taking input from user
value = write_read(num)
print(value) # printing the valueWait, that’s a basic example. Let’s do the CSV Logger.
# The CSV Data Logger
import serial
import csv
import time

ser = serial.Serial('COM3', 115200)
ser.flushInput()

while True:
    try:
        ser_bytes = ser.readline()
        decoded_bytes = ser_bytes[0:len(ser_bytes)-2].decode("utf-8")
        data_list = decoded_bytes.split(",")
        if len(data_list) == 3:
            print(f"Temp: {data_list[0]} | Hum: {data_list[1]} | Light: {data_list[2]}")
            # Save to file
            with open("sensor_data.csv", "a") as f:
                writer = csv.writer(f, delimiter=",")
                writer.writerow([time.time(), data_list[0], data_list[1], data_list[2]])
    except KeyboardInterrupt:
        print("Keyboard Interrupt")
breakSerial.readString)A common newbie mistake is using Serial.readString().
It is easy: String data = Serial.readString();
Why it is dangerous:
The Better Way: readStringUntil()
If we send a newline (\n) at the end of every command, we can tell Arduino to read only until it sees that character.
if (Serial.available()) {
  String command = Serial.readStringUntil('\n'); // Fast!
  command.trim(); // Remove whitespace
  if (command == "ON") {
    digitalWrite(13, HIGH);
  }
}
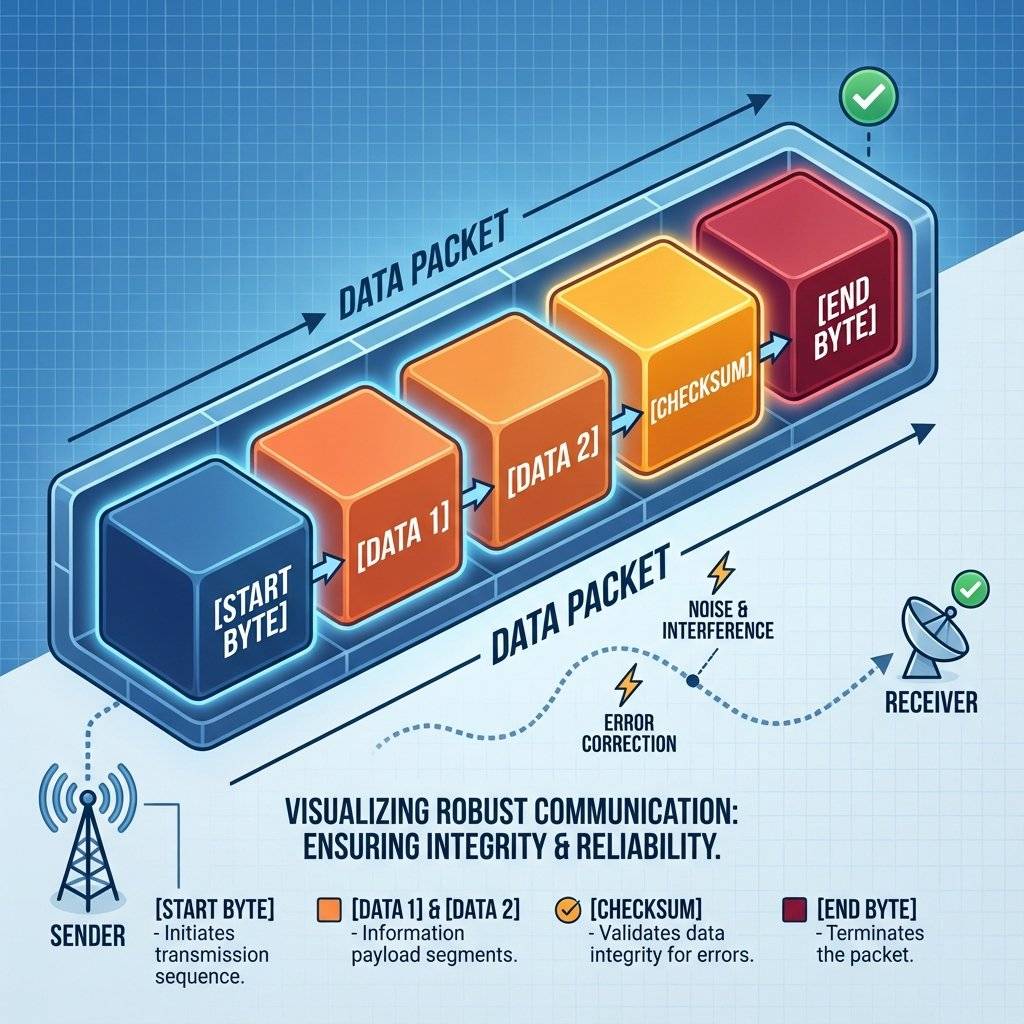
Sending raw numbers is risky. What if a “255” gets lost? Your RGB color becomes shifted. Red becomes Green. To fix this, engineers use Packets. A packet wraps the data in a protective shell.
Structure: [START_BYTE] [DATA] [CHECKSUM] [END_BYTE]
// Arduino Robust Sender
Serial.print("<");
Serial.print(temp);
Serial.print(",");
Serial.print(humidity);
Serial.println(">");
Python can then look for < and > to know exactly where the message begins and ends.
How do you know if a bit flipped due to noise?
You calculate a Checksum.
Simple method: Add all the numbers up.
Sent: 100, 200 -> Sum: 300.
Receive: 100, 199 -> Sum: 299.
Mismatch! Throw the packet away.
1. Alien Text / Garbage Chars
If you see ?, your Baud Rates do not match.
Check Serial.begin(X) and your Serial Monitor dropdown. They MUST be identical.
2. Port Busy / Access Denied Only ONE program can talk to the Arduino at a time. If you have the Arduino Serial Monitor open, your Python Script will fail. Close the Monitor before running Python.
3. Resetting on Connect By default, the Arduino Uno restarts (resets) whenever a Serial connection is opened (DTR line toggles). This is a feature (to upload code), but annoying for logging.
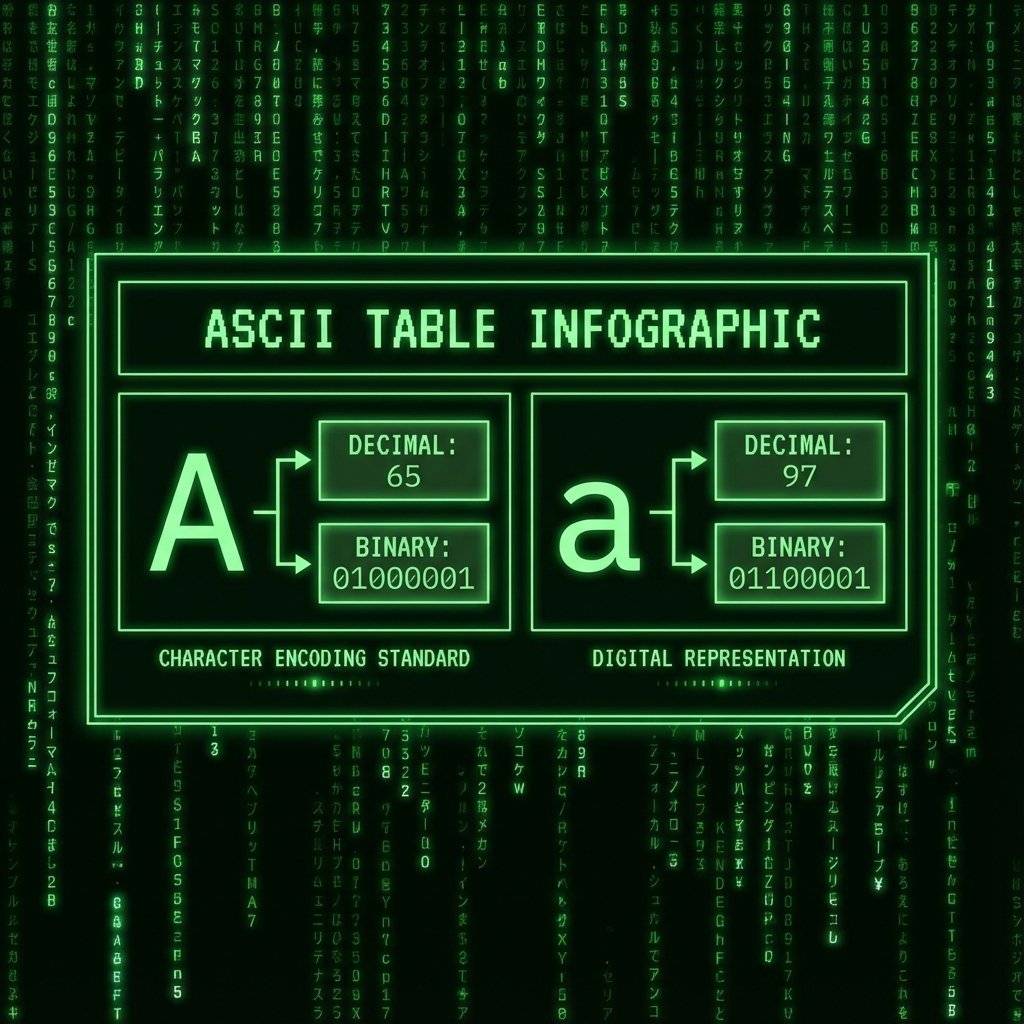
When you do Serial.print(100), you are sending 3 bytes: ‘1’, ‘0’, ‘0’.
This is ASCII (Human readable).
It is inefficient.
To send the number 100 efficiently, you can send 1 Byte (Binary).
Serial.write(100);
Hexadecimal (The Engineer’s Choice) Often, we view Serial data in Hex.
Why? Because binary is too long (`11010001`). Hex is compact (`0xD1`). If you see `0x0A` arriving constantly, that is the “Line Feed” character. If you see `0x0D`, that is “Carriage Return”.Endianness: The Big Scary Word
If you send a large number (like 50,000) using Serial.write(), it takes 2 bytes.
The question is: Which byte goes first?
The Arduino Uno only has ONE hardware Serial port (Pins 0 and 1). But what if you want to talk to the PC and a GPS module? Or talk to a Bluetooth module? You cannot share the pins. It’s like two people talking on the same phone line.
The Solution: SoftwareSerial We can use a library to “fake” a serial port on other digital pins. The CPU has to work harder to listen (bit-banging), but it works fine for 9600 baud.
#include <SoftwareSerial.h>

// RX on Pin 2, TX on Pin 3
SoftwareSerial mySerial(2, 3);

void setup() {
  Serial.begin(9600);    // Talk to PC
  mySerial.begin(9600);  // Talk to GPS/Bluetooth
}

void loop() {
  if (mySerial.available()) {
    Serial.write(mySerial.read()); // Pass data from GPS to PC
  }
}
Warning: SoftwareSerial is unreliable at high speeds (115200).
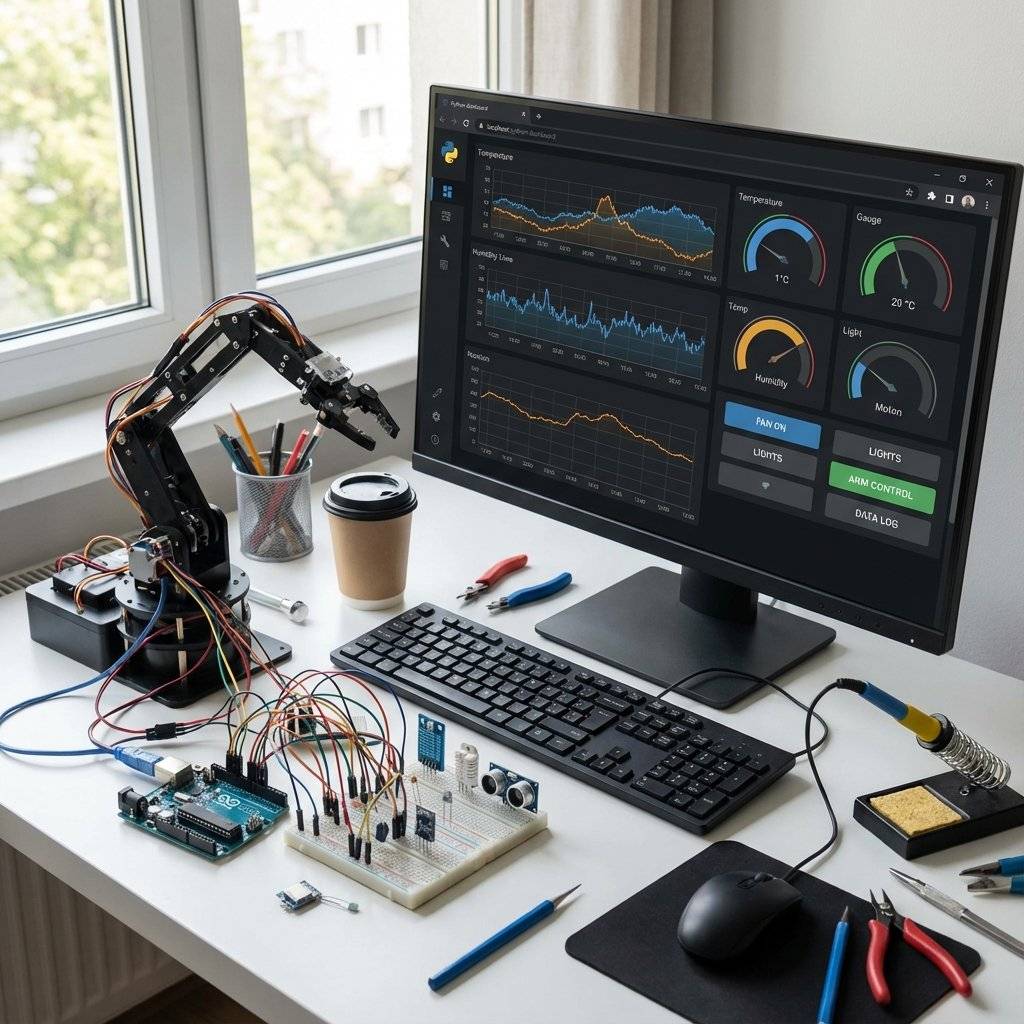
Using the concepts above, you can build a dashboard. Tools like Processing, Matlab, or just Python with Matplotlib can graph this data in real-time. This is how mission control screens work. The Arduino is just a dumb sensor gatherer. The PC is the brain.
You have the tools. Now build something fun. Create two Arduino sketches:
Connect two Arduinos (cross TX/RX on pins 2/3). Open two Serial Monitors on two different Ports. Result: You have built a chat room. When you type in one window, it appears in the other!
| Component | Quantity | Value | Notes |
|---|---|---|---|
| Arduino Uno | 1 | R3/Any | The primary controller. |
| USB Cable | 1 | Type A/B | Data pipeline. |
| Python | 1 | 3.10+ | Scripting on PC. |
| pyserial | 1 | Library | Python Serial driver. |
| Breadboard | 1 | Any | For optional components. |
You have broken the fourth wall. Your Arduino is now part of a larger ecosystem. You can log temperature data to an Excel sheet for a year. You can control a robot arm using a Python AI script. You can build a web interface that talks to Python, which talks to Arduino.
Next Up: We have mastered wires. But wires are tethers. They limit us to 1 meter. Tomorrow (Day 27), we cut the cord. We are going wireless with IR Remotes (Infrared). We will decode TV remotes and control our projects from the couch. See you on Day 27.

A complete, end-to-end guide on building a secure, scalable IoT device using ESP32, MQTT, and AWS IoT Core. We bridge the gap between software logic and hardware reality.
Read More →
WiFi barely reaches your driveway. LoRa reaches the next town. Master the SX1278 module, Chirp Spread Spectrum physics, and build a 5km range sensor network.
Read More →
Stop polling your server every 5 seconds. Learn why Professional IoT uses MQTT. Master Pub/Sub architecture, QoS levels, Retained Messages, and Last Will & Testament.
Read More →