From Code to Reality: Building a Production-Grade IoT Device
A complete, end-to-end guide on building a secure, scalable IoT device using ESP32, MQTT, and AWS IoT Core. We bridge the gap between software logic and hardware reality.
Read More →
* SYSTEM.NOTICE: Affiliate links support continued laboratory research.
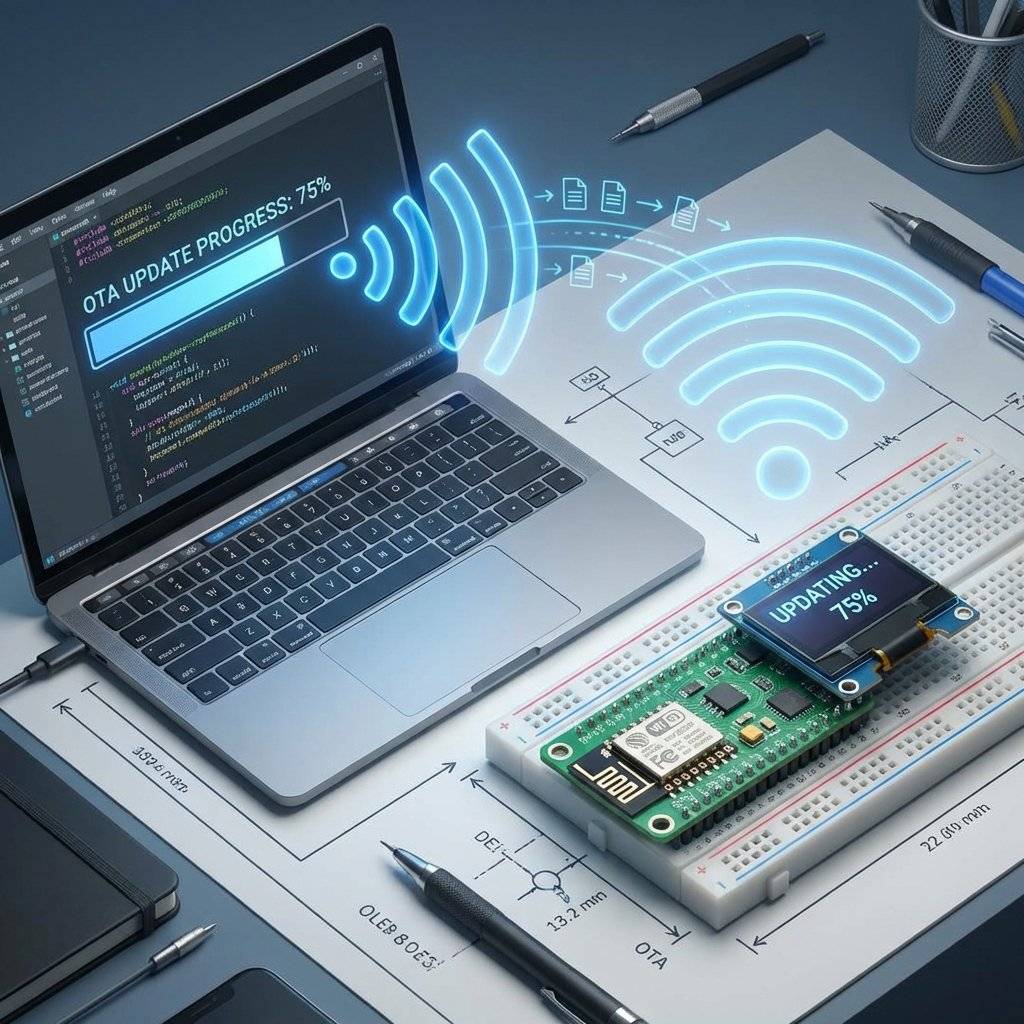
Imagine you have installed a weather station on your roof. It is February. It is raining. You discover a bug in your code. Do you: A) Get the ladder, climb the slippery roof, unscrew the waterproof case, and plug in a USB cable? B) Sit on your couch, press “Upload” in Arduino IDE, and watch the magic happen?
If you chose B, welcome to OTA (Over-The-Air) Updates. This is the difference between a “Hobbyist Project” and a “Professional Product”. Today, we will learn how to flash firmware wirelessly, secure it with passwords, and understand the deep memory mechanics that make it possible.
Normally, the ESP8266 bootloader waits for a signal on the UART (Serial) pins to accept new code. With OTA, the logic changes:
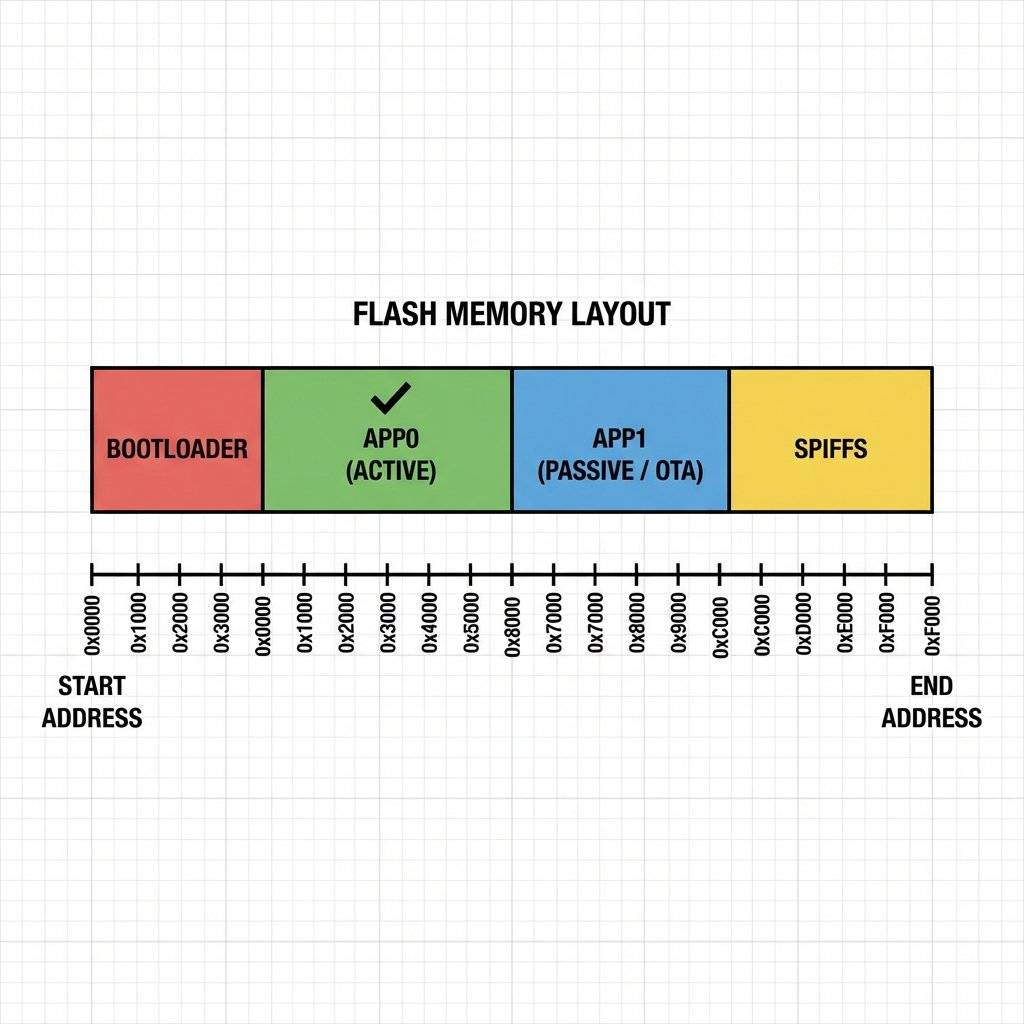
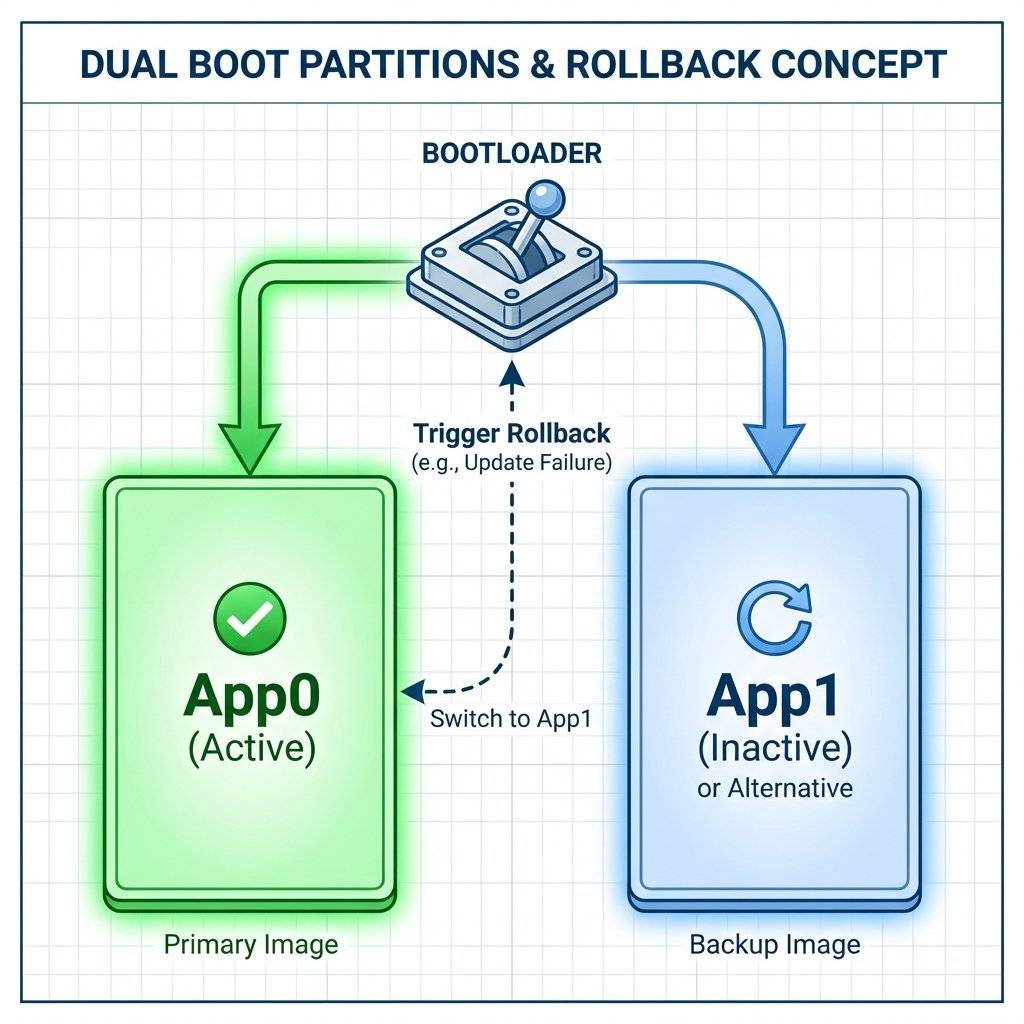
Your ESP8266 (e.g., 4MB Flash) is not just one big bucket. It is sliced up.
When you do an OTA update, you are NOT overwriting App0. You are writing to App1. Only after a successful checksum verification does the Bootloader flip the switch to boot from App1 next time.
We use the standard ArduinoOTA library. It makes this process shockingly easy.
#include <ESP8266WiFi.h>
#include <ESP8266mDNS.h>
#include <WiFiUdp.h>
#include <ArduinoOTA.h>
const char* ssid = "MyWiFi";
const char* password = "MyPassword";
void setup() {
Serial.begin(115200);
WiFi.mode(WIFI_STA);
WiFi.begin(ssid, password);
while (WiFi.status() != WL_CONNECTED) {
delay(500);
Serial.print(".");
}
// --- OTA CONFIGURATION ---
// Port defaults to 8266
ArduinoOTA.setPort(8266);
// Hostname defaults to esp8266-[ChipID]
ArduinoOTA.setHostname("LivingRoom-Sensor");
// No authentication by default
// ArduinoOTA.setPassword("admin");
// Define what happens during the update
ArduinoOTA.onStart([]() {
String type;
if (ArduinoOTA.getCommand() == U_FLASH) {
type = "sketch";
} else { // U_FS
type = "filesystem";
}
// NOTE: if updating FS this would be the place to unmount FS using SPIFFS.end()
Serial.println("Start updating " + type);
});
ArduinoOTA.onEnd([]() {
Serial.println("\nEnd");
});
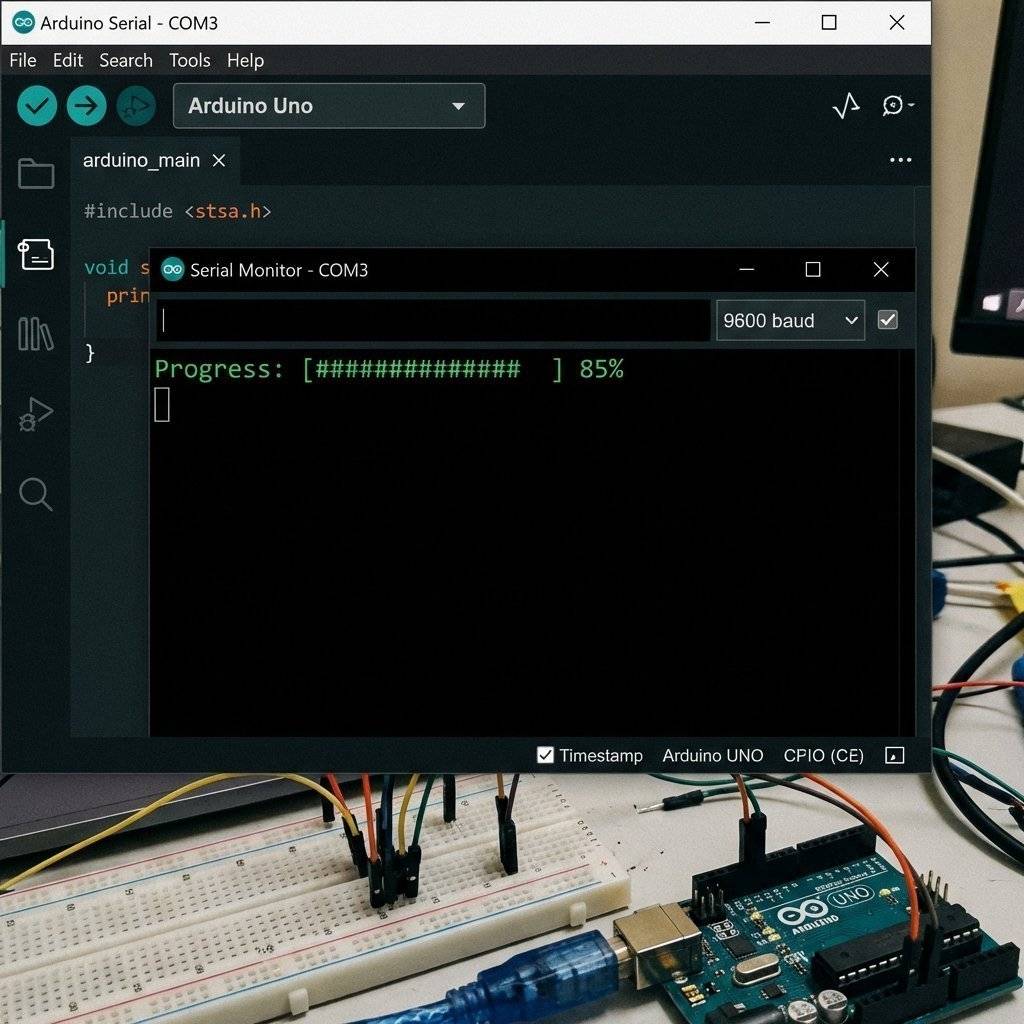
ArduinoOTA.onProgress([](unsigned int progress, unsigned int total) {
Serial.printf("Progress: %u%%\r", (progress / (total / 100)));
});
ArduinoOTA.onError([](ota_error_t error) {
Serial.printf("Error[%u]: ", error);
if (error == OTA_AUTH_ERROR) Serial.println("Auth Failed");
else if (error == OTA_BEGIN_ERROR) Serial.println("Begin Failed");
else if (error == OTA_CONNECT_ERROR) Serial.println("Connect Failed");
else if (error == OTA_RECEIVE_ERROR) Serial.println("Receive Failed");
else if (error == OTA_END_ERROR) Serial.println("End Failed");
});
ArduinoOTA.begin();
Serial.println("Ready");
Serial.print("IP address: ");
Serial.println(WiFi.localIP());
}
void loop() {
// CRITICAL: You must call this frequently
ArduinoOTA.handle();
// Your normal code goes here
}There is a Catch-22. To update wirelessly, the code must already have OTA support. So, for the very first time, you must use the USB cable to upload this sketch. Once it is running:
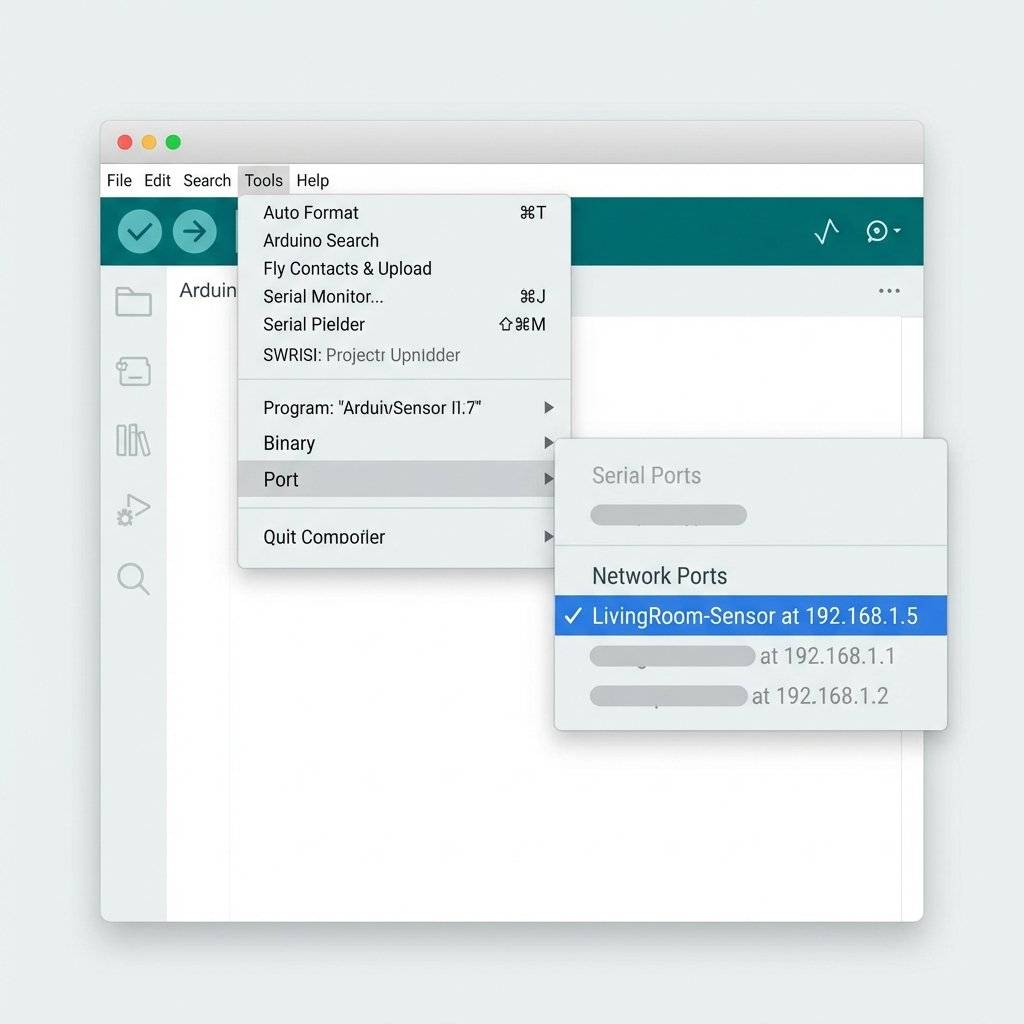
Now, simply click Upload. The IDE will compile the code, find the ESP over the network, handshake, and blast the firmware over WiFi. Speed Note: It is often faster than USB (1MB/s vs 115200 baud).
By default, anyone on your WiFi can upload code to your ESP. If you are at a Hackathon or a Coffee Shop, this is a disaster. Someone could upload a “Brick” sketch or malware.
The Fix: Set a Password.
// Add this in setup()
ArduinoOTA.setPassword("SuperSecret123");
Now, when you click Upload in the IDE, a popup window will appear asking for the credentials.
setPasswordHash if you don’t even want the plain text password in your compiled binary (preventing reverse engineering).
When an update starts, your device stops doing its main job.
The onStart Callback:
This is where you make the device safe.
The onProgress Callback:
You can draw a progress bar on an OLED screen or Serial Monitor.
ArduinoOTA.onProgress([](unsigned int progress, unsigned int total) {
  int percent = (progress / (total / 100));
  display.clearDisplay();
  display.setCursor(0,0);
  display.print("Updating: ");
  display.print(percent);
  display.print("%");
  display.display();
});
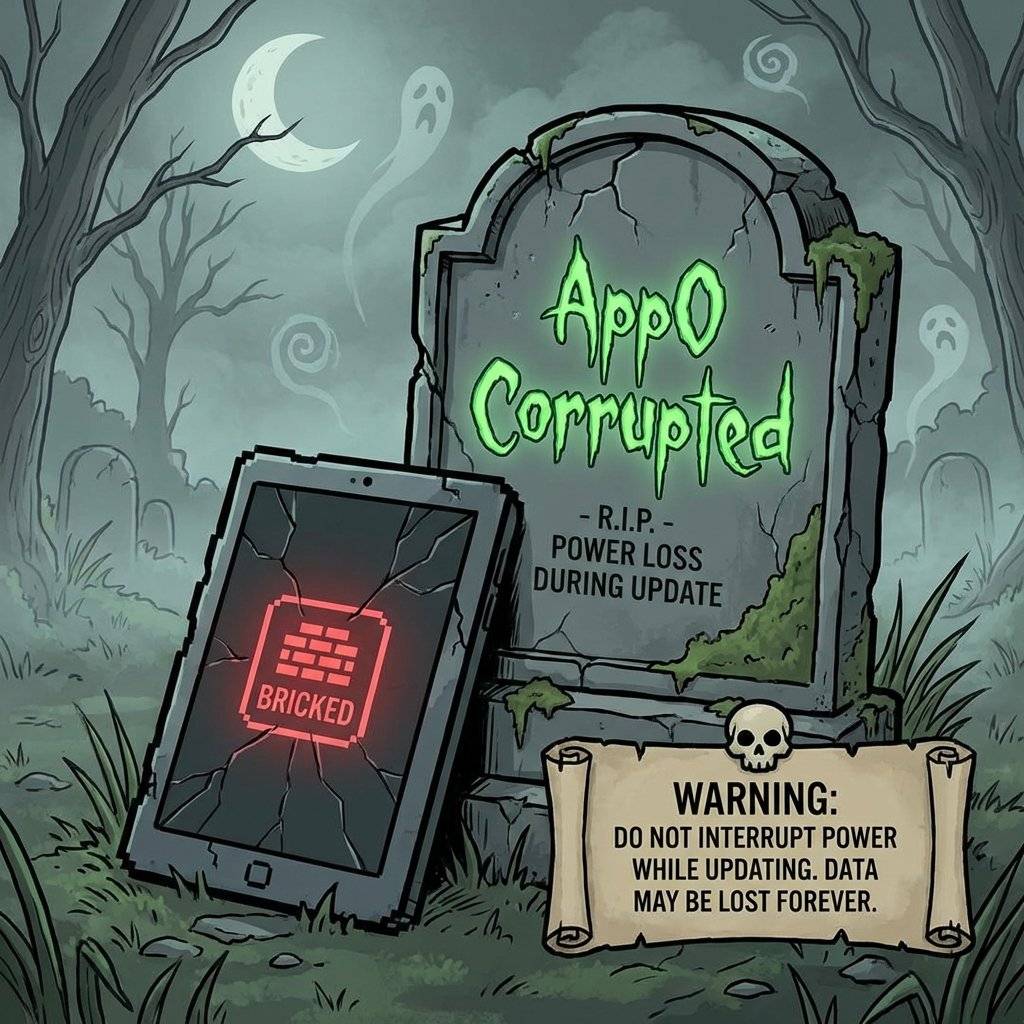
When you upload via OTA, you are uploading the Currently Open Sketch. WARNING: If you upload a sketch that does not have the OTA code inside it, you permanently lose OTA capability. The next update will have to be via USB cable.
Best Practice:
Create a ota_handler.h file. Include it in every single project you make. Never write the boilerplate again.
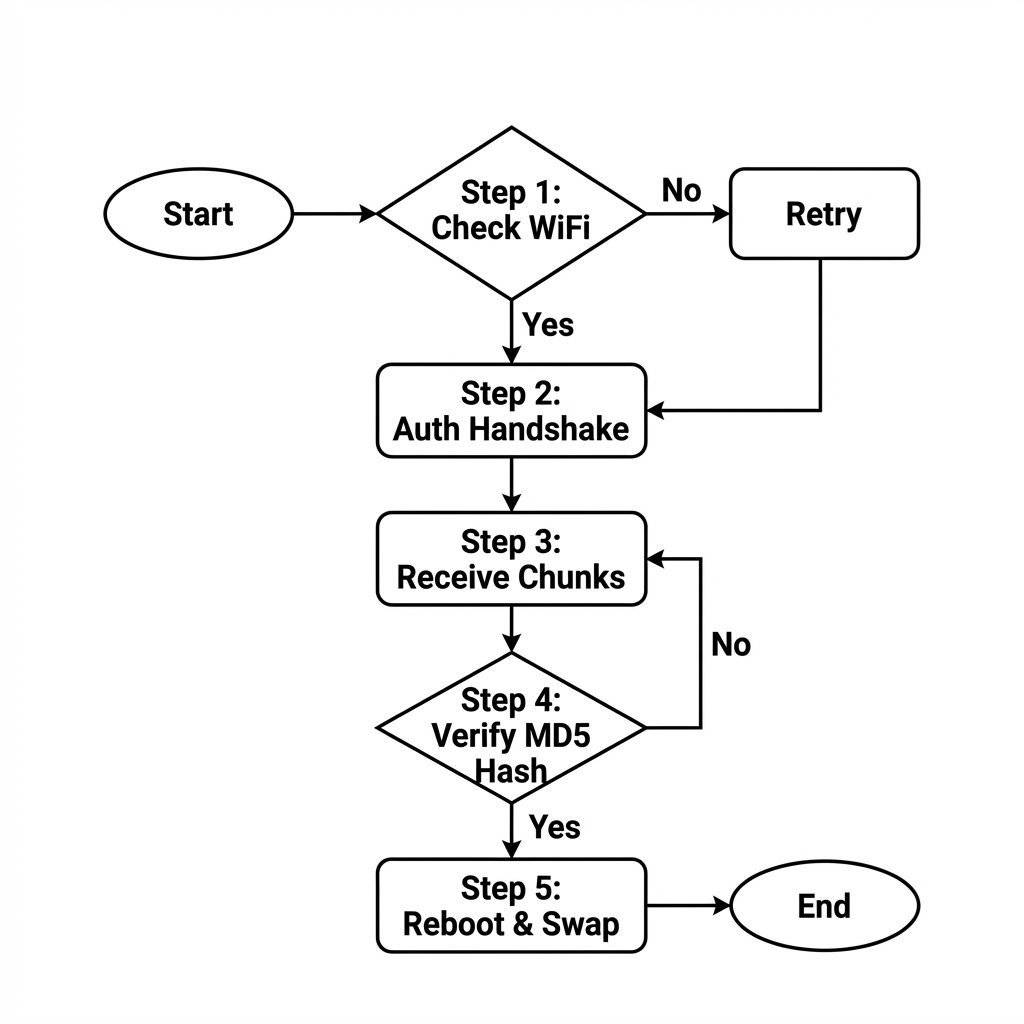
WiFi Loss: If WiFi drops at 50%, the ESP detects the disconnection/timeout. It discards the half-written App1 partition and simply boots back into App0. Safe.
Power Loss: Same as above. The Bootloader Config isn’t updated until the very end.
Bad Code: You uploaded code that crashes immediately (WDT Reset).
This is the real danger. If the new code goes into a Reboot Loop, it never connects to WiFi, and you can’t OTA again.
The Fix: Implement a “Safe Mode”.
On Boot, check a pin. If logic is HIGH, enter a minimalist “OTA Only” mode and skip the main application logic.
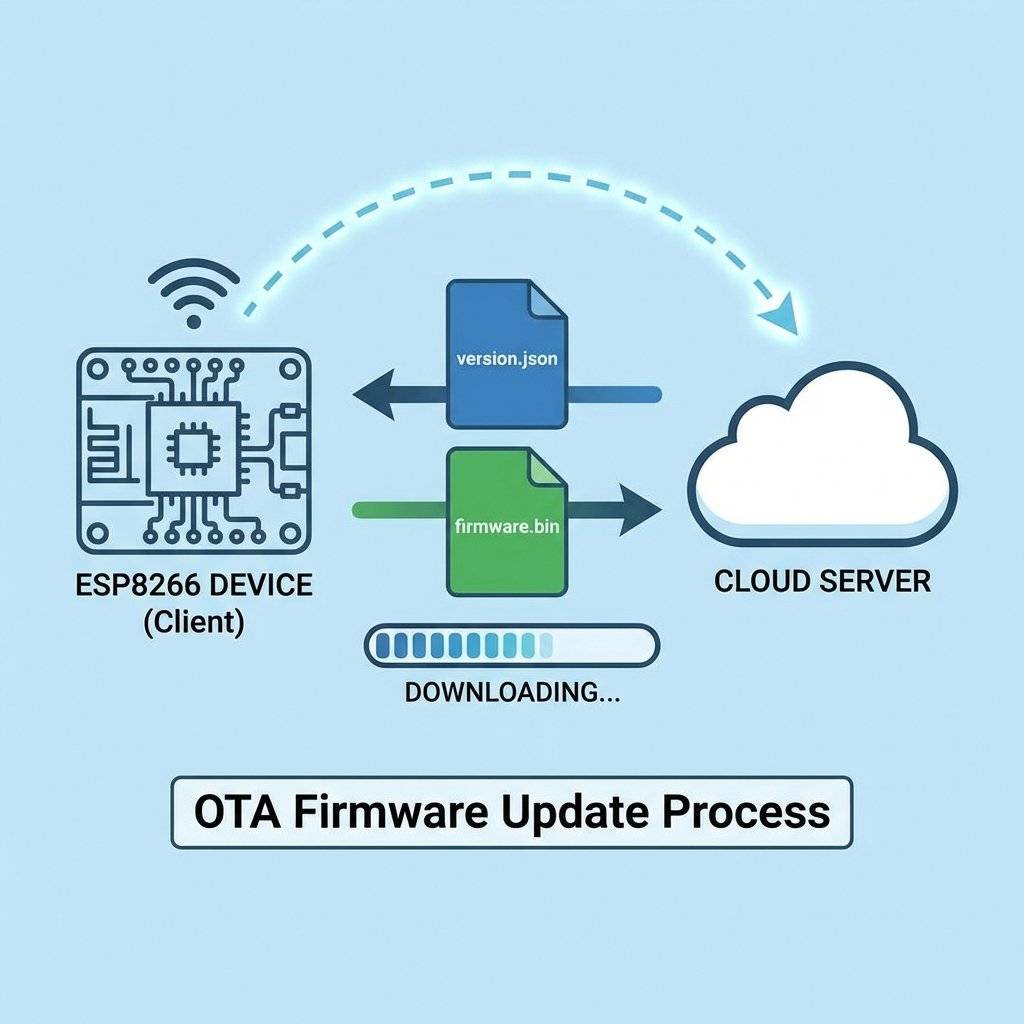
ArduinoOTA pushes code from your PC. But what if you want to update 1,000 devices deployed in customers’ homes? You can’t visit them all. The device must Pull updates from a server.
ESP8266httpUpdate Library:
The ESP checks a URL: http://myserver.com/firmware/version.json.
It sees a newer version exists.
It downloads the .bin file from the server.
It flashes itself.
#include <ESP8266httpUpdate.h>

void checkForUpdate() {
  t_httpUpdate_return ret = ESPhttpUpdate.update(client, "http://myserver.com/firmware.bin");

  switch (ret) {
    case HTTP_UPDATE_FAILED:
      Serial.printf("HTTP_UPDATE_FAILED Error (%d): %s\n", ESPhttpUpdate.getLastError(), ESPhttpUpdate.getLastErrorString().c_str());
      break;
    case HTTP_UPDATE_NO_UPDATES:
      Serial.println("HTTP_UPDATE_NO_UPDATES");
      break;
    case HTTP_UPDATE_OK:
      Serial.println("HTTP_UPDATE_OK");
      break;
  }
}
(Technical Deep Dive)
Why do you sometimes see “1MB (FS:64KB OTA:~470KB)” in Arduino Tools? Because you need SPACE for the update.
Case 1: 4MB Flash (NodeMCU):
App0 (1MB): Current code.
App1 (1MB): Reserve update space.
FS (1MB): Filesystem storage.
WiFi (1MB): SDK settings and calibration.
Result: You can have huge code.
Case 2: 1MB Flash (ESP-01):
App0 (490KB): Max code size for OTA.
App1 (490KB): Clone space.
Result: Your code CANNOT be larger than 490KB, or OTA will fail (Not enough space to download the copy).
Tip: If OTA fails with “No Space”, reduce your File System size in the Tools menu to free up Flash for the App.
What if you don’t have Arduino IDE? What if you want to update from your iPhone?
You can run a mini Website on the ESP8266 that accepts a .bin file upload.
The Code:
#include <ESP8266WiFi.h>
#include <ESP8266WebServer.h>
#include <ESP8266HTTPUpdateServer.h>

ESP8266WebServer httpServer(80);
ESP8266HTTPUpdateServer httpUpdater;

void setup() {
  // ... WiFi Setup ...
// This adds the /update page
  httpUpdater.setup(&httpServer);
  httpServer.begin();
  Serial.println("HTTP Update Server Ready");
  Serial.printf("Open http://%s/update in your browser\n", WiFi.localIP().toString().c_str());
}

void loop() {
  httpServer.handleClient();
}
How to Use:
In Arduino IDE, go to Sketch -> Export Compiled Binary.
It creates a .bin file in your project folder.
Open http://192.168.1.X/update.
Drag and drop the .bin file.
Done. The device reboots with new code.
We will build a device that we never plug in again.
Copyright © 2026 TechnoChips. Open Source Hardware (OSHW).

A complete, end-to-end guide on building a secure, scalable IoT device using ESP32, MQTT, and AWS IoT Core. We bridge the gap between software logic and hardware reality.
Read More →
WiFi barely reaches your driveway. LoRa reaches the next town. Master the SX1278 module, Chirp Spread Spectrum physics, and build a 5km range sensor network.
Read More →
Stop polling your server every 5 seconds. Learn why Professional IoT uses MQTT. Master Pub/Sub architecture, QoS levels, Retained Messages, and Last Will & Testament.
Read More →