Build a Working Radar: Mapping Rooms with Arduino, Ultrasonics, and Servos
Combine sensors and servos to build a real-time scanning radar. Learn Polar Coordinates, Serial Plotting, and data visualization.
Read More →
* SYSTEM.NOTICE: Affiliate links support continued laboratory research.
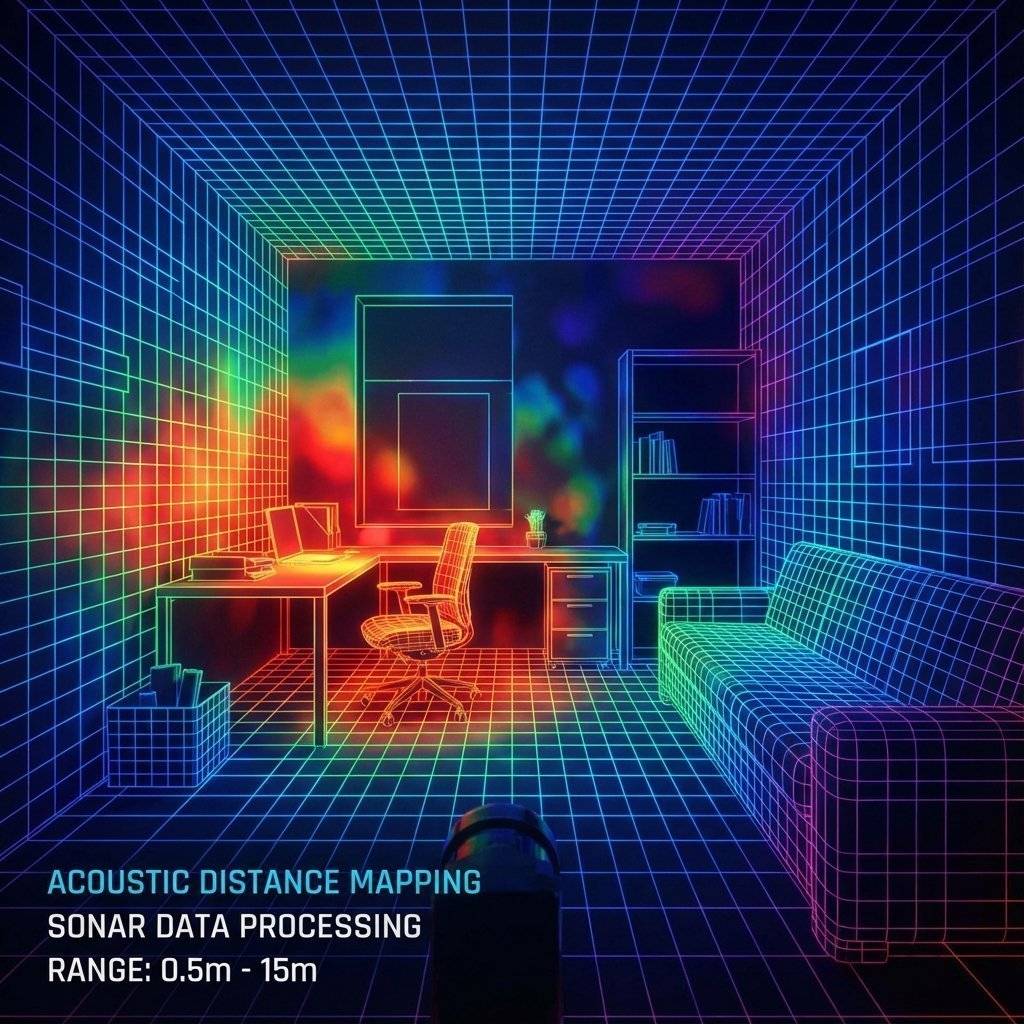
Now, we shift our focus to Perception. A robot that cannot see is just a remote-controlled car. To be autonomous, a machine must understand its environment. It needs to answer the question: “How far away is that wall?”
Today, we are going to give your Arduino Bat Vision. We are going to use the HC-SR04 Ultrasonic Sensor. It uses sound waves to measure distance with millimeter precision. It is the standard “Eye” for every beginner robot, but to master it, you need to understand the physics of sound.
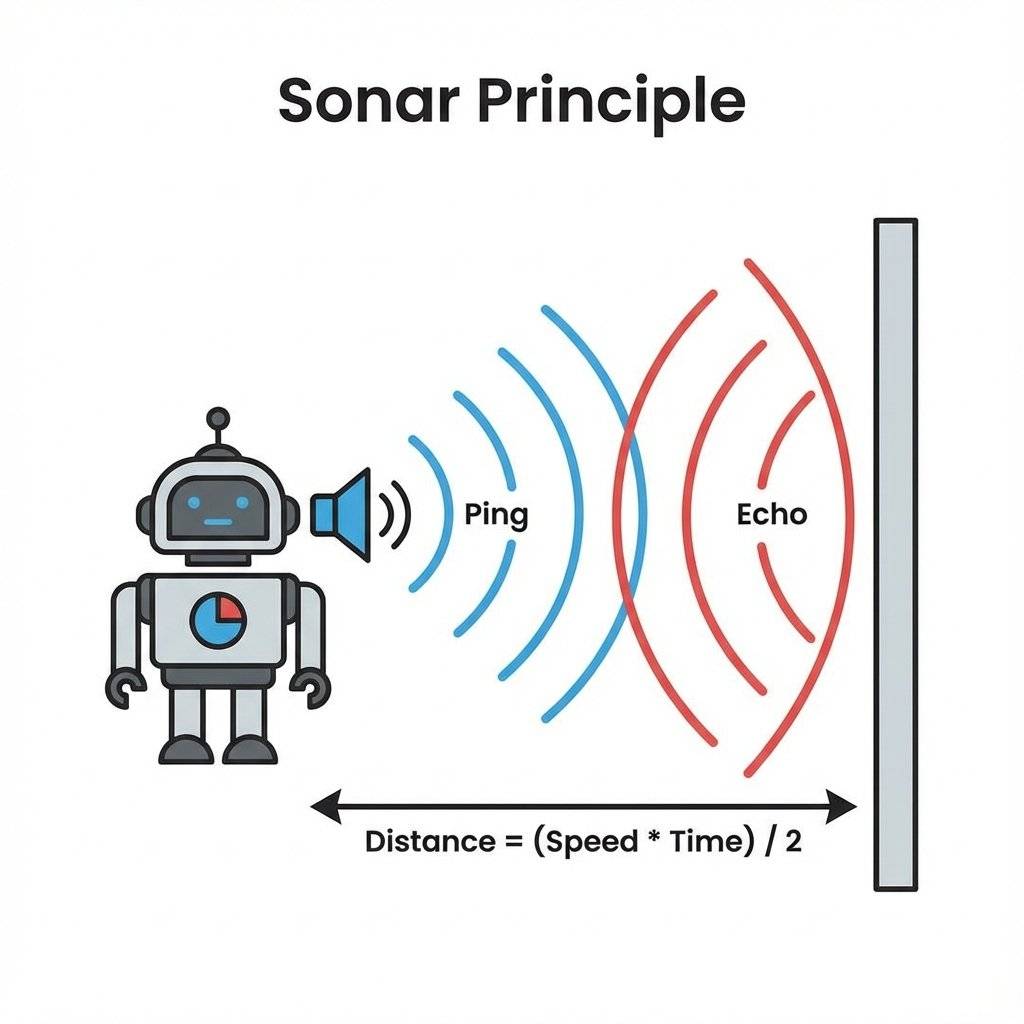
Humans see with light (Photons). Bats and Dolphins see with sound (Sonar). SoNAR stands for Sound Navigation And Ranging.
The concept is simple:
Since we know the speed of sound, we can calculate the distance. . Why divide by 2? Because the sound has to travel to the wall AND back. We only want the distance to the wall.
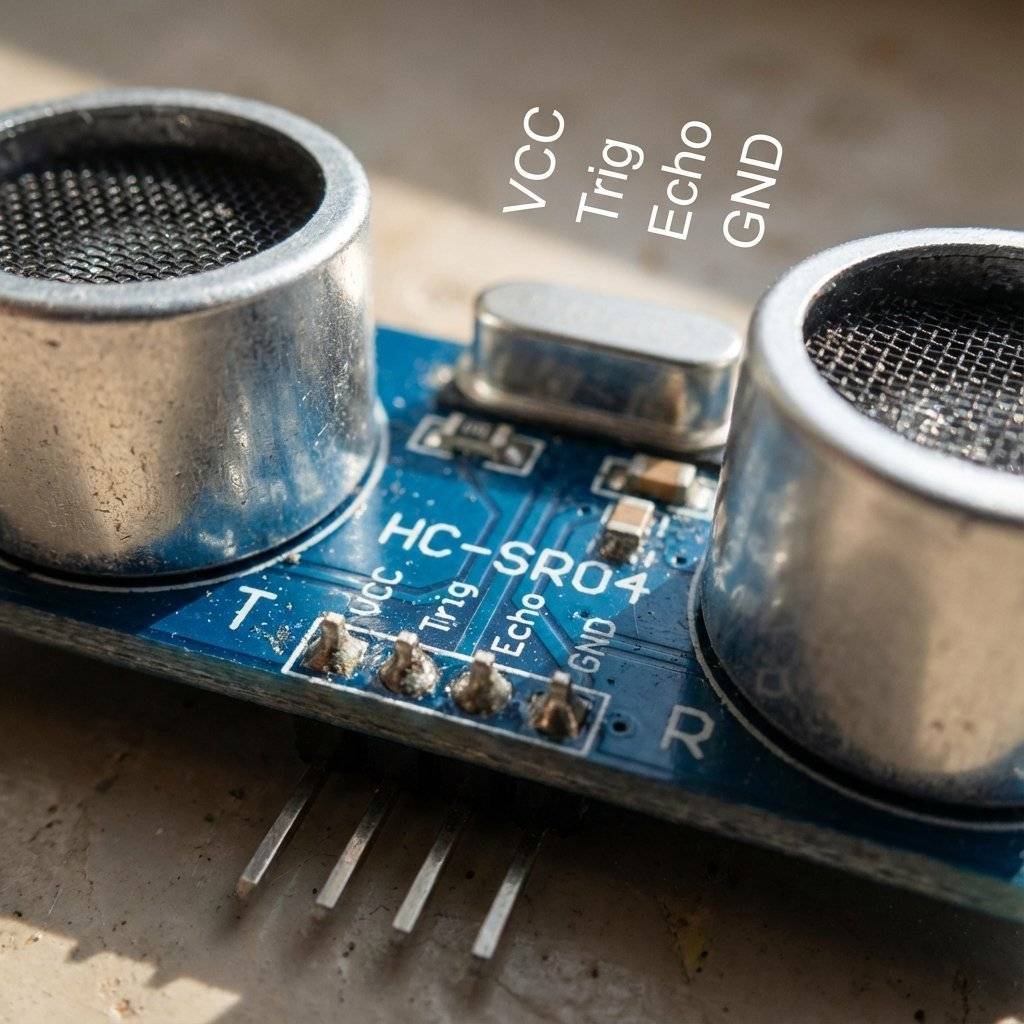
This iconic module looks like a pair of robot eyes. But they aren’t eyes. They are speakers.
Why ? Human hearing ranges from to (). is “Ultra” sonic. We cannot hear it. This is good, because otherwise your robot would be screaming constantly.
It has 4 pins.
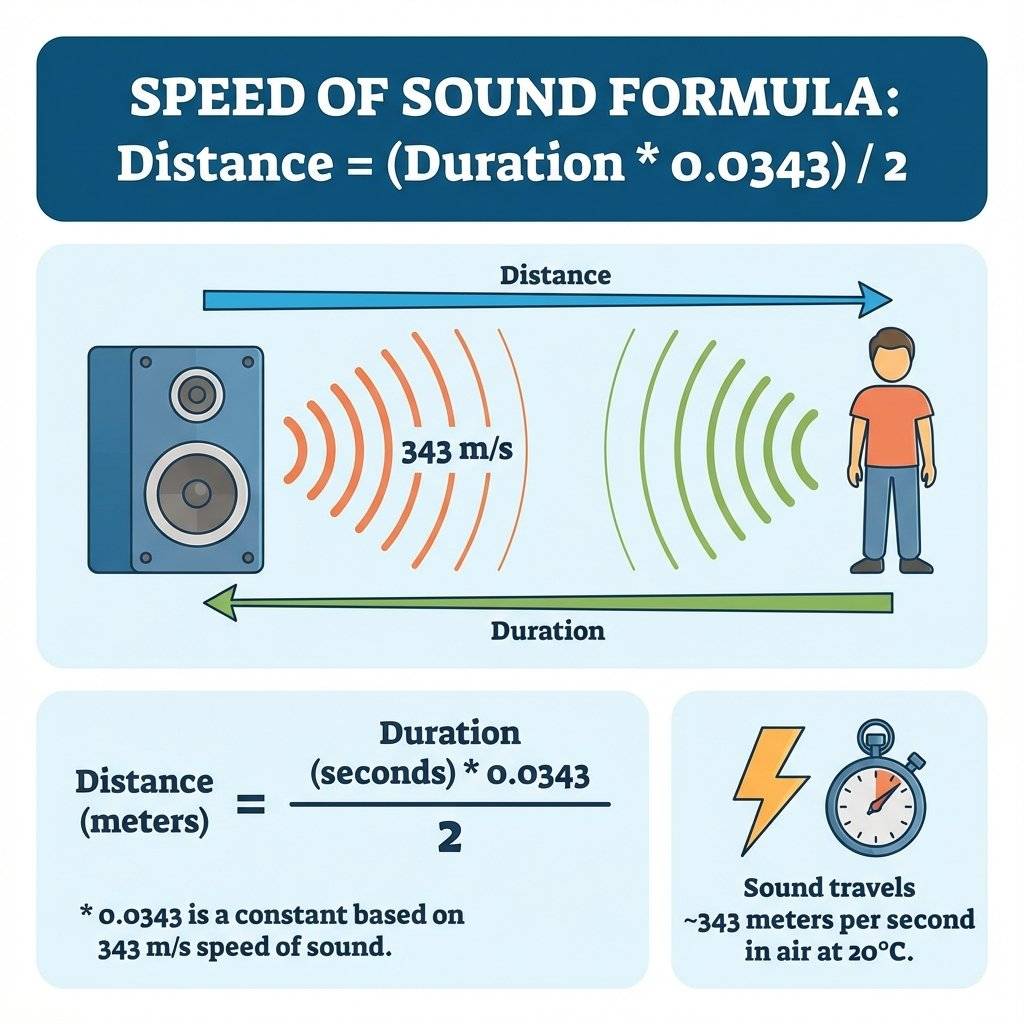
To measure distance, we need a constant. The Speed of Sound in dry air at is . Or: .
So, the formula for our code will be:
Simplifying the math: (Most people round this to roughly Duration / 29 for the one-way trip).
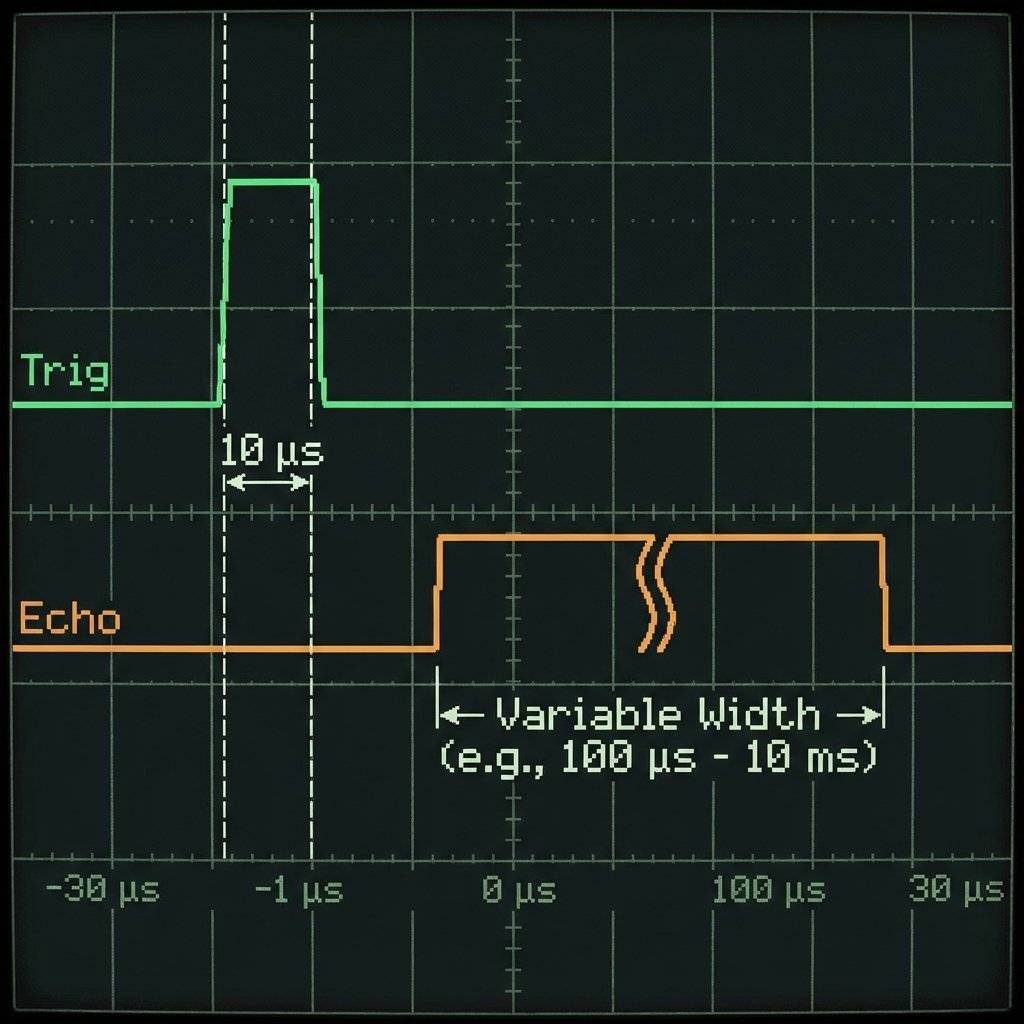
pulseIn()How do we measure “Microseconds” on Arduino?
We use a special command: pulseIn(pin, HIGH).
This function pauses the Arduino.
It is perfectly designed for the HC-SR04 Echo pin.
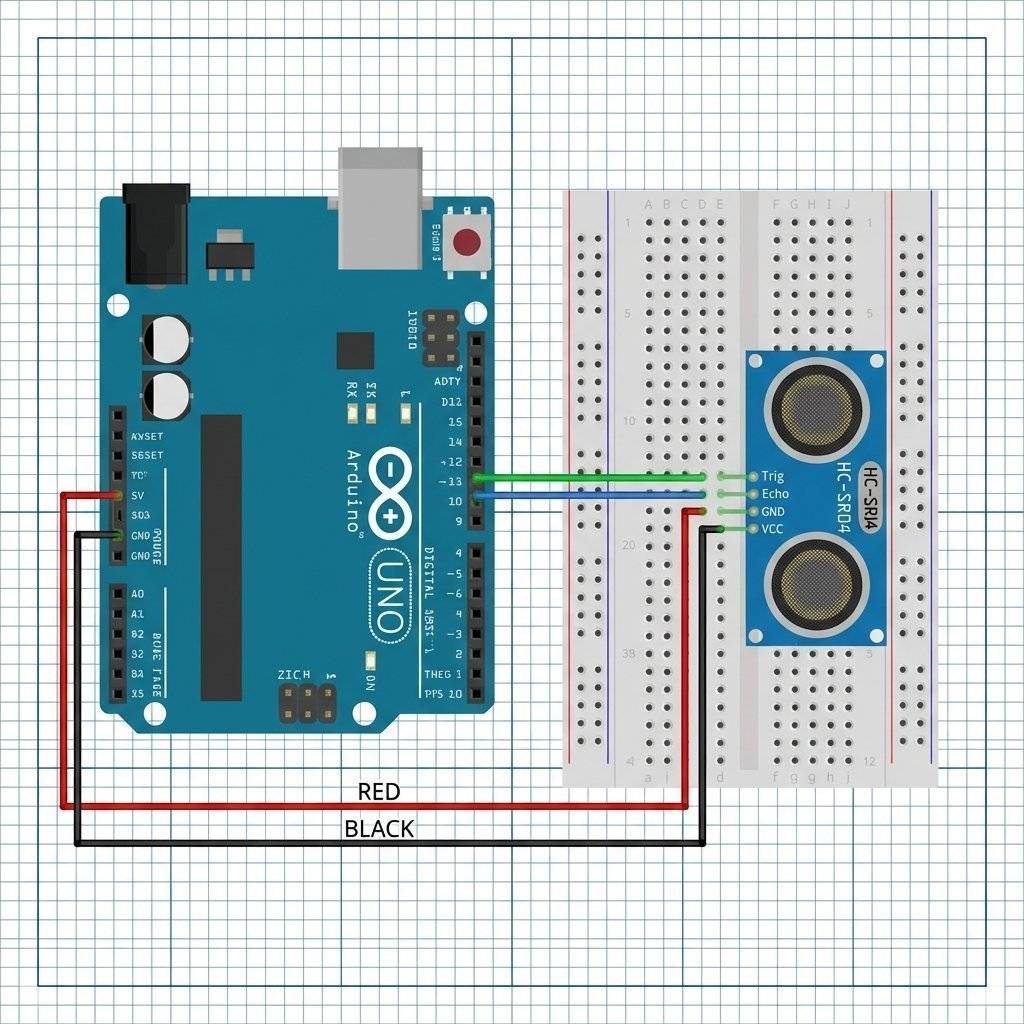
Let’s build a tape measure. Wiring:
The Code:
const int trigPin = 9;
const int echoPin = 10;

void setup() {
  pinMode(trigPin, OUTPUT);
  pinMode(echoPin, INPUT); // Echo sends data TO us
  Serial.begin(9600);
}

void loop() {
  // 1. Clear the Trig Pin
  digitalWrite(trigPin, LOW);
  delayMicroseconds(2);

  // 2. Fire the "Ping" (10 microsecond pulse)
  digitalWrite(trigPin, HIGH);
  delayMicroseconds(10);
  digitalWrite(trigPin, LOW);

  // 3. Listen for the Echo
  // result is time in microseconds
  long duration = pulseIn(echoPin, HIGH);

  // 4. Calculate Distance
  // Speed of sound = $343\text{m/s}$ = $0.0343\text{ cm/}\mu s$
  int distanceCm = duration * 0.0343 / 2;

  // 5. Print
  Serial.print("Distance: ");
  Serial.print(distanceCm);
  Serial.println(" cm");

  delay(100); // Don't ping too fast!
}
Upload it. Open Serial Monitor. Put your hand in front of the sensor. Move it back and forth. You should see the numbers change in real-time.
Why did we do that weird HIGH/LOW dance at the start?
digitalWrite(trigPin, HIGH); delayMicroseconds(10);
The HC-SR04 has a microchip on board.
It sleeps until it receives a “Wake Up” pulse on the Trig pin.
The datasheet says this pulse must be at least long.
If you just click it ON and OFF instantly, the sensor ignores you.
You have to hold the button down for .
Once it wakes up, it automatically fires 8 pulses of sound (the “Sonic Burst”).
NewPing LibraryThe manual code above is good for learning, but bad for multitasking.
pulseIn() pauses your entire robot. It freezes the brain.
For advanced robots, we use the NewPing library (by Tim Eckel).
It is faster, more accurate, and can ping multiple sensors without freezing the code.
#include <NewPing.h>

#define TRIGGER_PIN  12
#define ECHO_PIN     11
#define MAX_DISTANCE 200

NewPing sonar(TRIGGER_PIN, ECHO_PIN, MAX_DISTANCE);

void loop() {
  delay(50);
  Serial.print("Ping: ");
  Serial.print(sonar.ping_cm());
  Serial.println("cm");
}
This library handles all the physics math for you. It also fixes the “Zero” error when no echo is received. However, for this week, stick to the manual method so you understand the raw physics first.
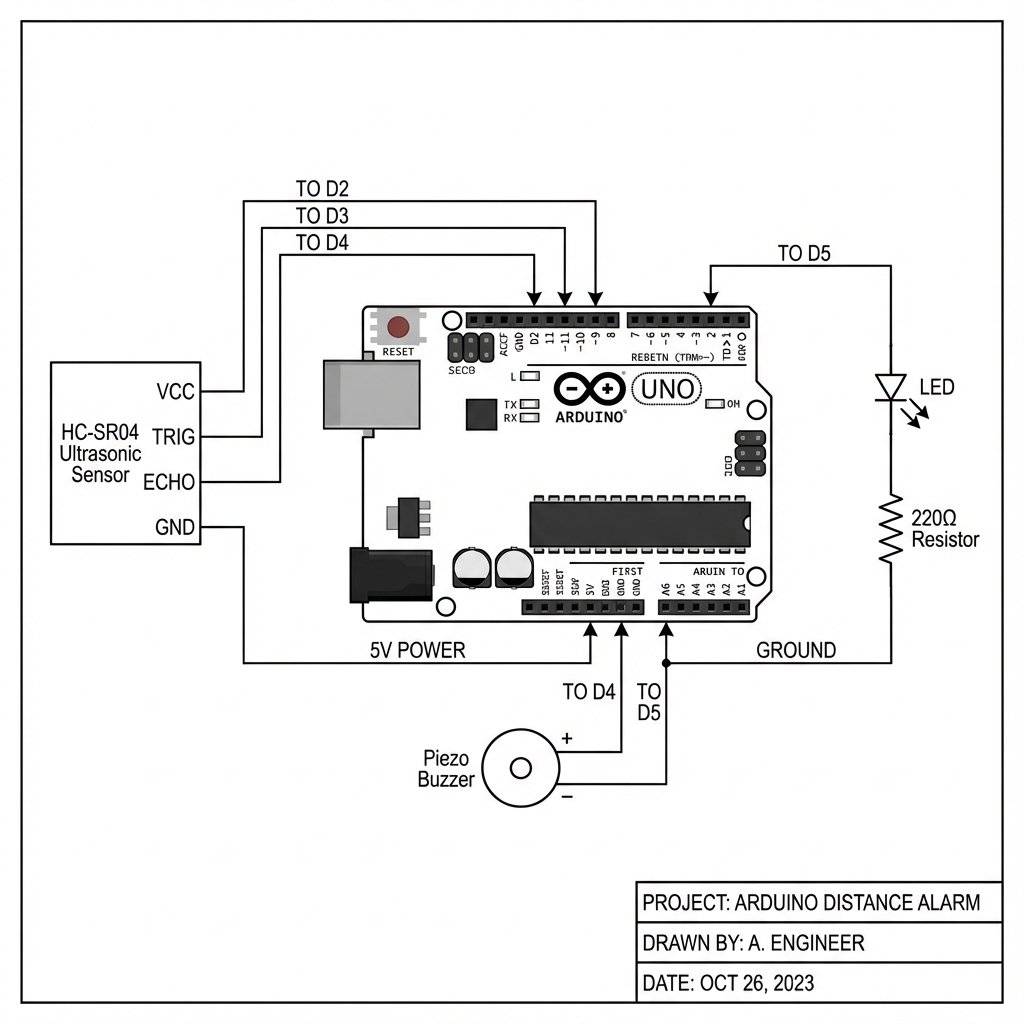
Reading numbers is boring. Let’s build a car reversing aid. beep… beep… beep.. beep.beep.beep! Add Components:
The Logic:
int buzzerPin = 11;

void loop() {
  // ... (Calculation Code from Project 1) ...
  if (distanceCm < 10) {
    // CRITICAL: Scream
    tone(buzzerPin, 1000);
  }
  else if (distanceCm < 50) {
    // DANGER: Fast Beep
    tone(buzzerPin, 1000);
    delay(50);
    noTone(buzzerPin);
    delay(distanceCm * 2); // Dynamic delay!
  }
  else if (distanceCm < 100) {
    // WARNING: Slow Beep
    tone(buzzerPin, 1000);
    delay(100);
    noTone(buzzerPin);
    delay(500);
  }
  else {
    // SAFE: Silence
    noTone(buzzerPin);
    delay(100);
  }
}
Notice the trick: delay(distanceCm * 2).
As the distance gets smaller, the delay gets shorter.
The beeping naturally speeds up as you get closer.
This is Algorithmic Audio.
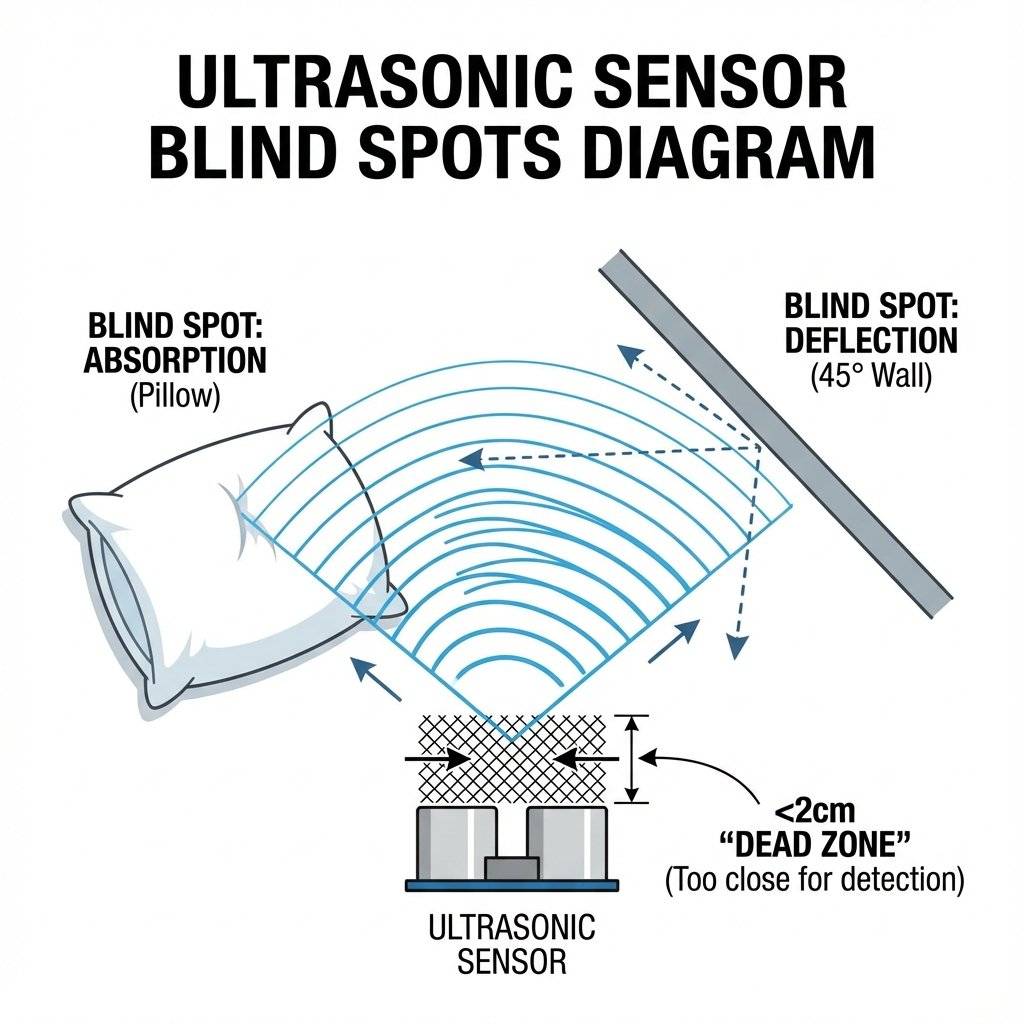
The HC-SR04 is magical, but it is not perfect. Bat vision has flaws.
Remember the number ? That is only true at . Sound travels faster in warm air and slower in cold air. Formula:
This is a 7% Error. If you are building a precision instrument, you need to add a Thermistor (Day 16) to measure the air temperature and adjust your math dynamically. For a parking sensor? It doesn’t matter. But for a lab experiment, it is critical.
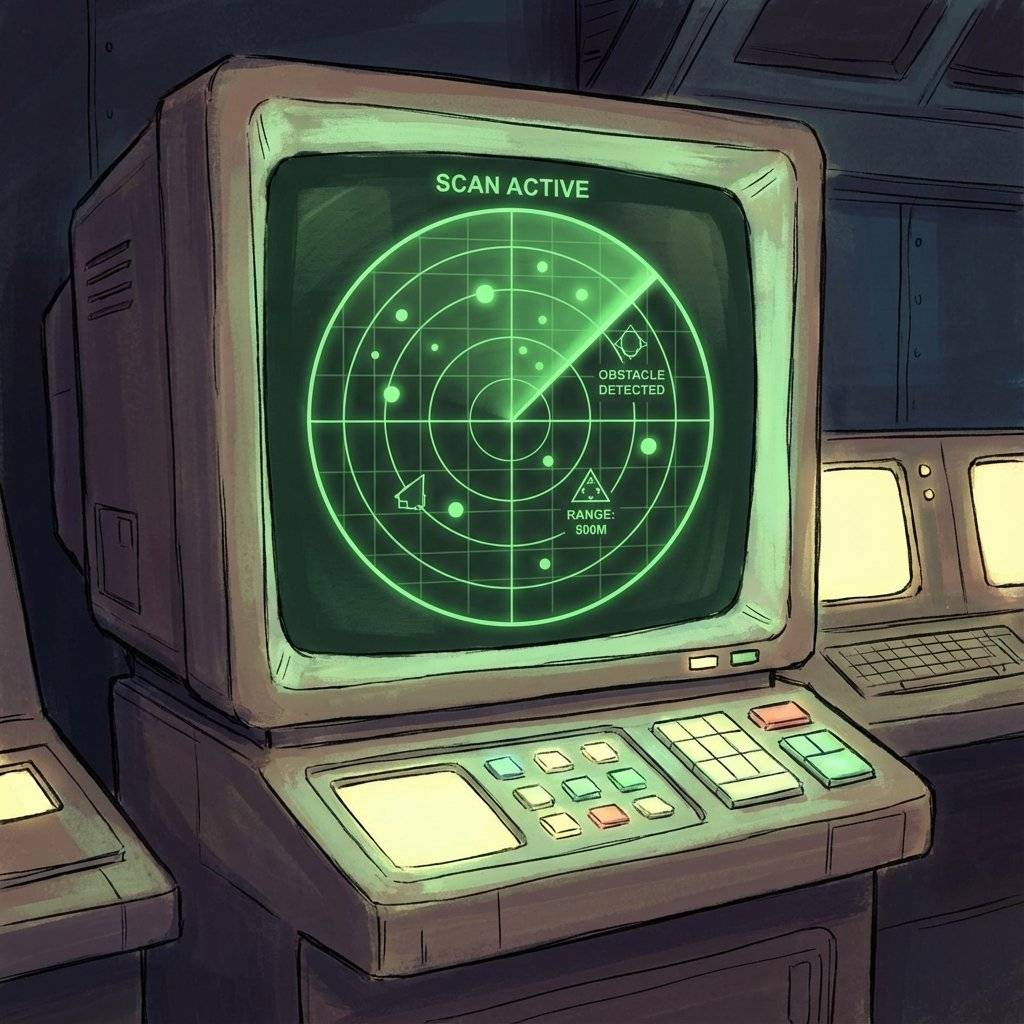
What if we mounted the sensor on a Servo motor? And we swept it back and forth? We could map the entire room. We could send the data (Angle, Distance) to the PC. Using a program like Processing or Python, we can draw a green radar sweep screen. This is called LIDAR (if using light) or Sonar Mapping. We will build this in Week 8.
Who invented this technology? It wasn’t for robots. It was for war and icebergs. After the Titanic sank in 1912, the world realized we needed a way to see underwater. In 1915, French physicist Paul Langevin invented the first active sonar to detect submarines during WWI. He used quartz crystals (Piezoelectricity!) to generate sound waves in water. Today’s HC-SR04 uses the exact same piezoelectric principle, just in air instead of water. From hunting U-Boats to parking your Toyota Prius, the tech hasn’t changed much in 100 years.
The HC-SR04 has a fatal flaw. It has open mesh speakers. If it rains, it dies. If you are building an outdoor rover or a boat, you need the JSN-SR04T. It looks like a car’s reverse parking sensor (black, sealed, waterproof).
A final warning about “Ultrasonic”. We cannot hear .
You might buy a sensor that has only 3 pins (VCC, GND, SIG). This is the Ping))) sensor style (popularized by Parallax). It uses the SAME pin for Trigger and Echo.
| Component | Quantity | Value | Notes |
|---|---|---|---|
| Arduino Uno | 1 | Any | The Brain |
| HC-SR04 | 1 | Ultrasonic | The Sensor |
| Buzzer | 1 | Passive/Active | The Alarm |
| Jumper Wires | 4 | M-F | Connectivity |
| Breadboard | 1 | Half | Prototyping |
You have given your machine a sense of space. Before today, your robot existed in a void. Now, it knows if it is about to crash. It knows if a human is walking by. It has spatial awareness.
This sensor is the cornerstone of the Obstacle Avoiding Robot, which is our final boss project. But an eye is useless without a body. To make a robot meaningful, we need to move. We learned DC Motors (Day 17), but they are dumb. They just spin. We need precision motion. We need to move exactly 90 degrees. We need the Servo Motor.
Tomorrow, on Day 22, we master the Servo. We will build a robotic arm that can wave hello.
See you on Day 22.

Combine sensors and servos to build a real-time scanning radar. Learn Polar Coordinates, Serial Plotting, and data visualization.
Read More →
Turn your Arduino into a robotics controller. Master the SG90 Servo Motor, understand closed-loop control systems, and build precise robotic joints.
Read More →
Master the Mechanical Relay. Learn how to control desk lamps, fans, and heavy appliances using an Arduino. Understanding NO, NC, and Galvanic Isolation.
Read More →